Studebaker Starlight Coupe 1951Text and photos by Alf StalsbergCLICK ON ANY IMAGE TO ENLARGE IT
This is a page covering my restoration of a Studebaker Starlight Coupe 1951.
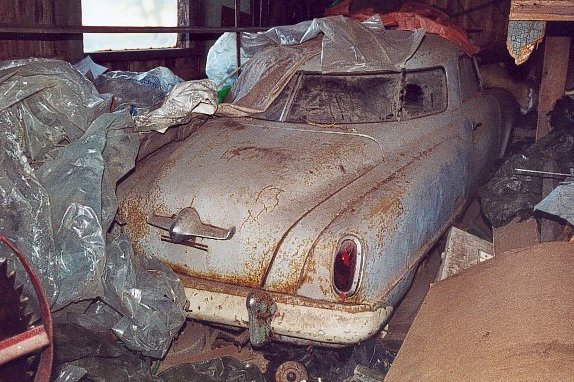
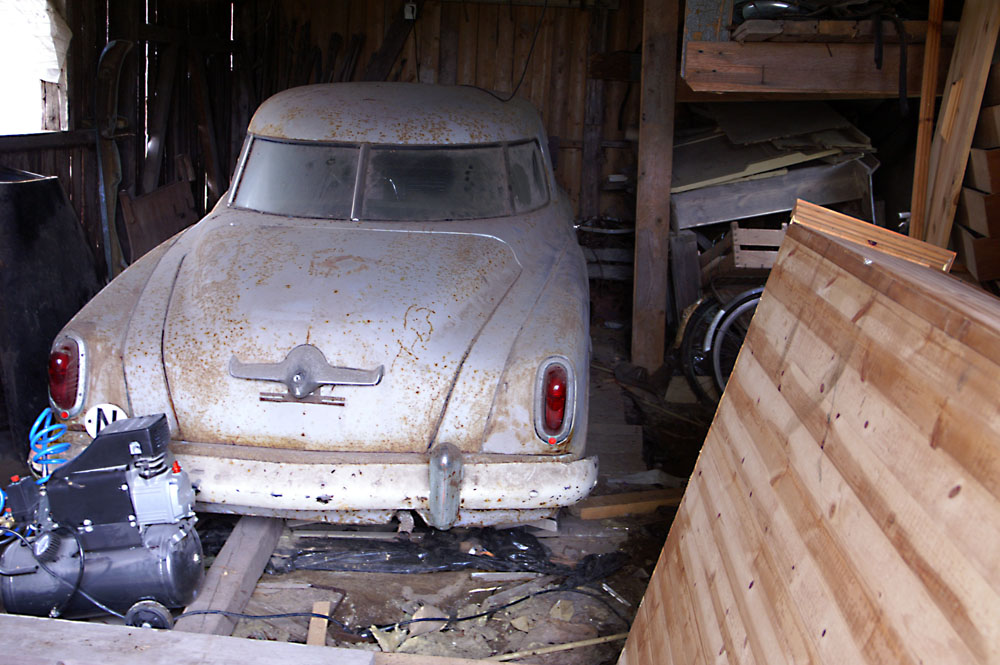
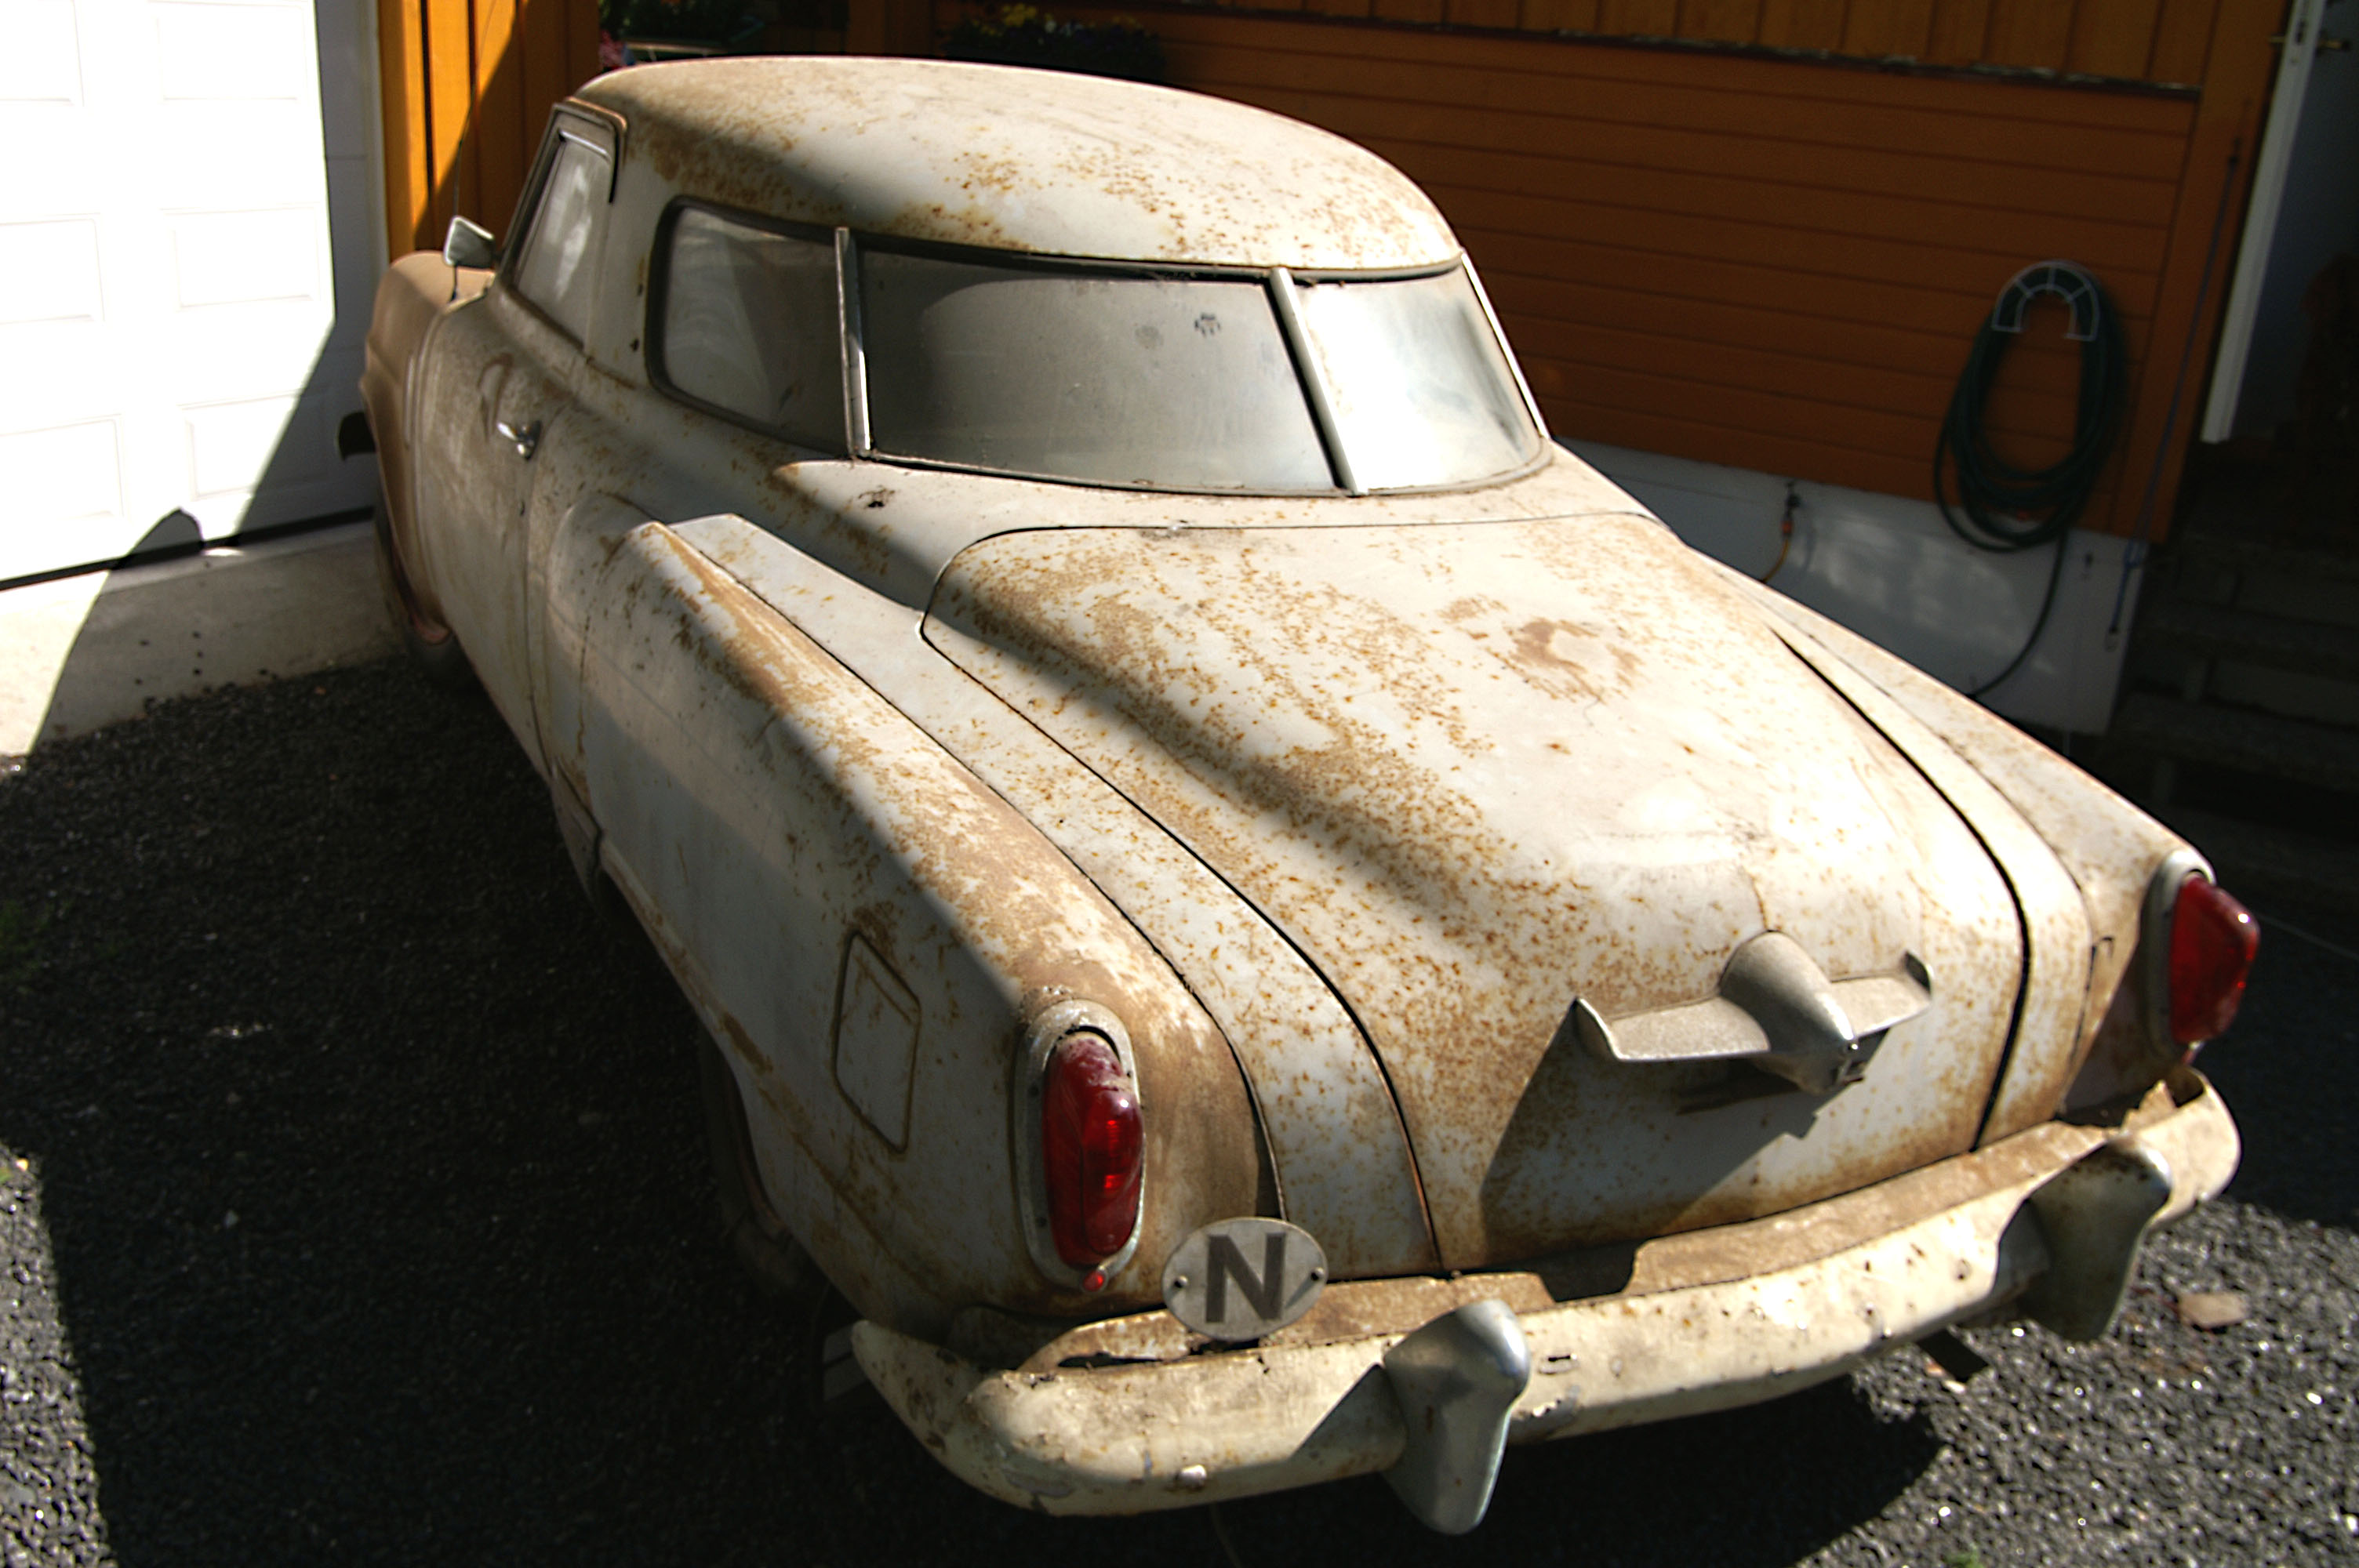
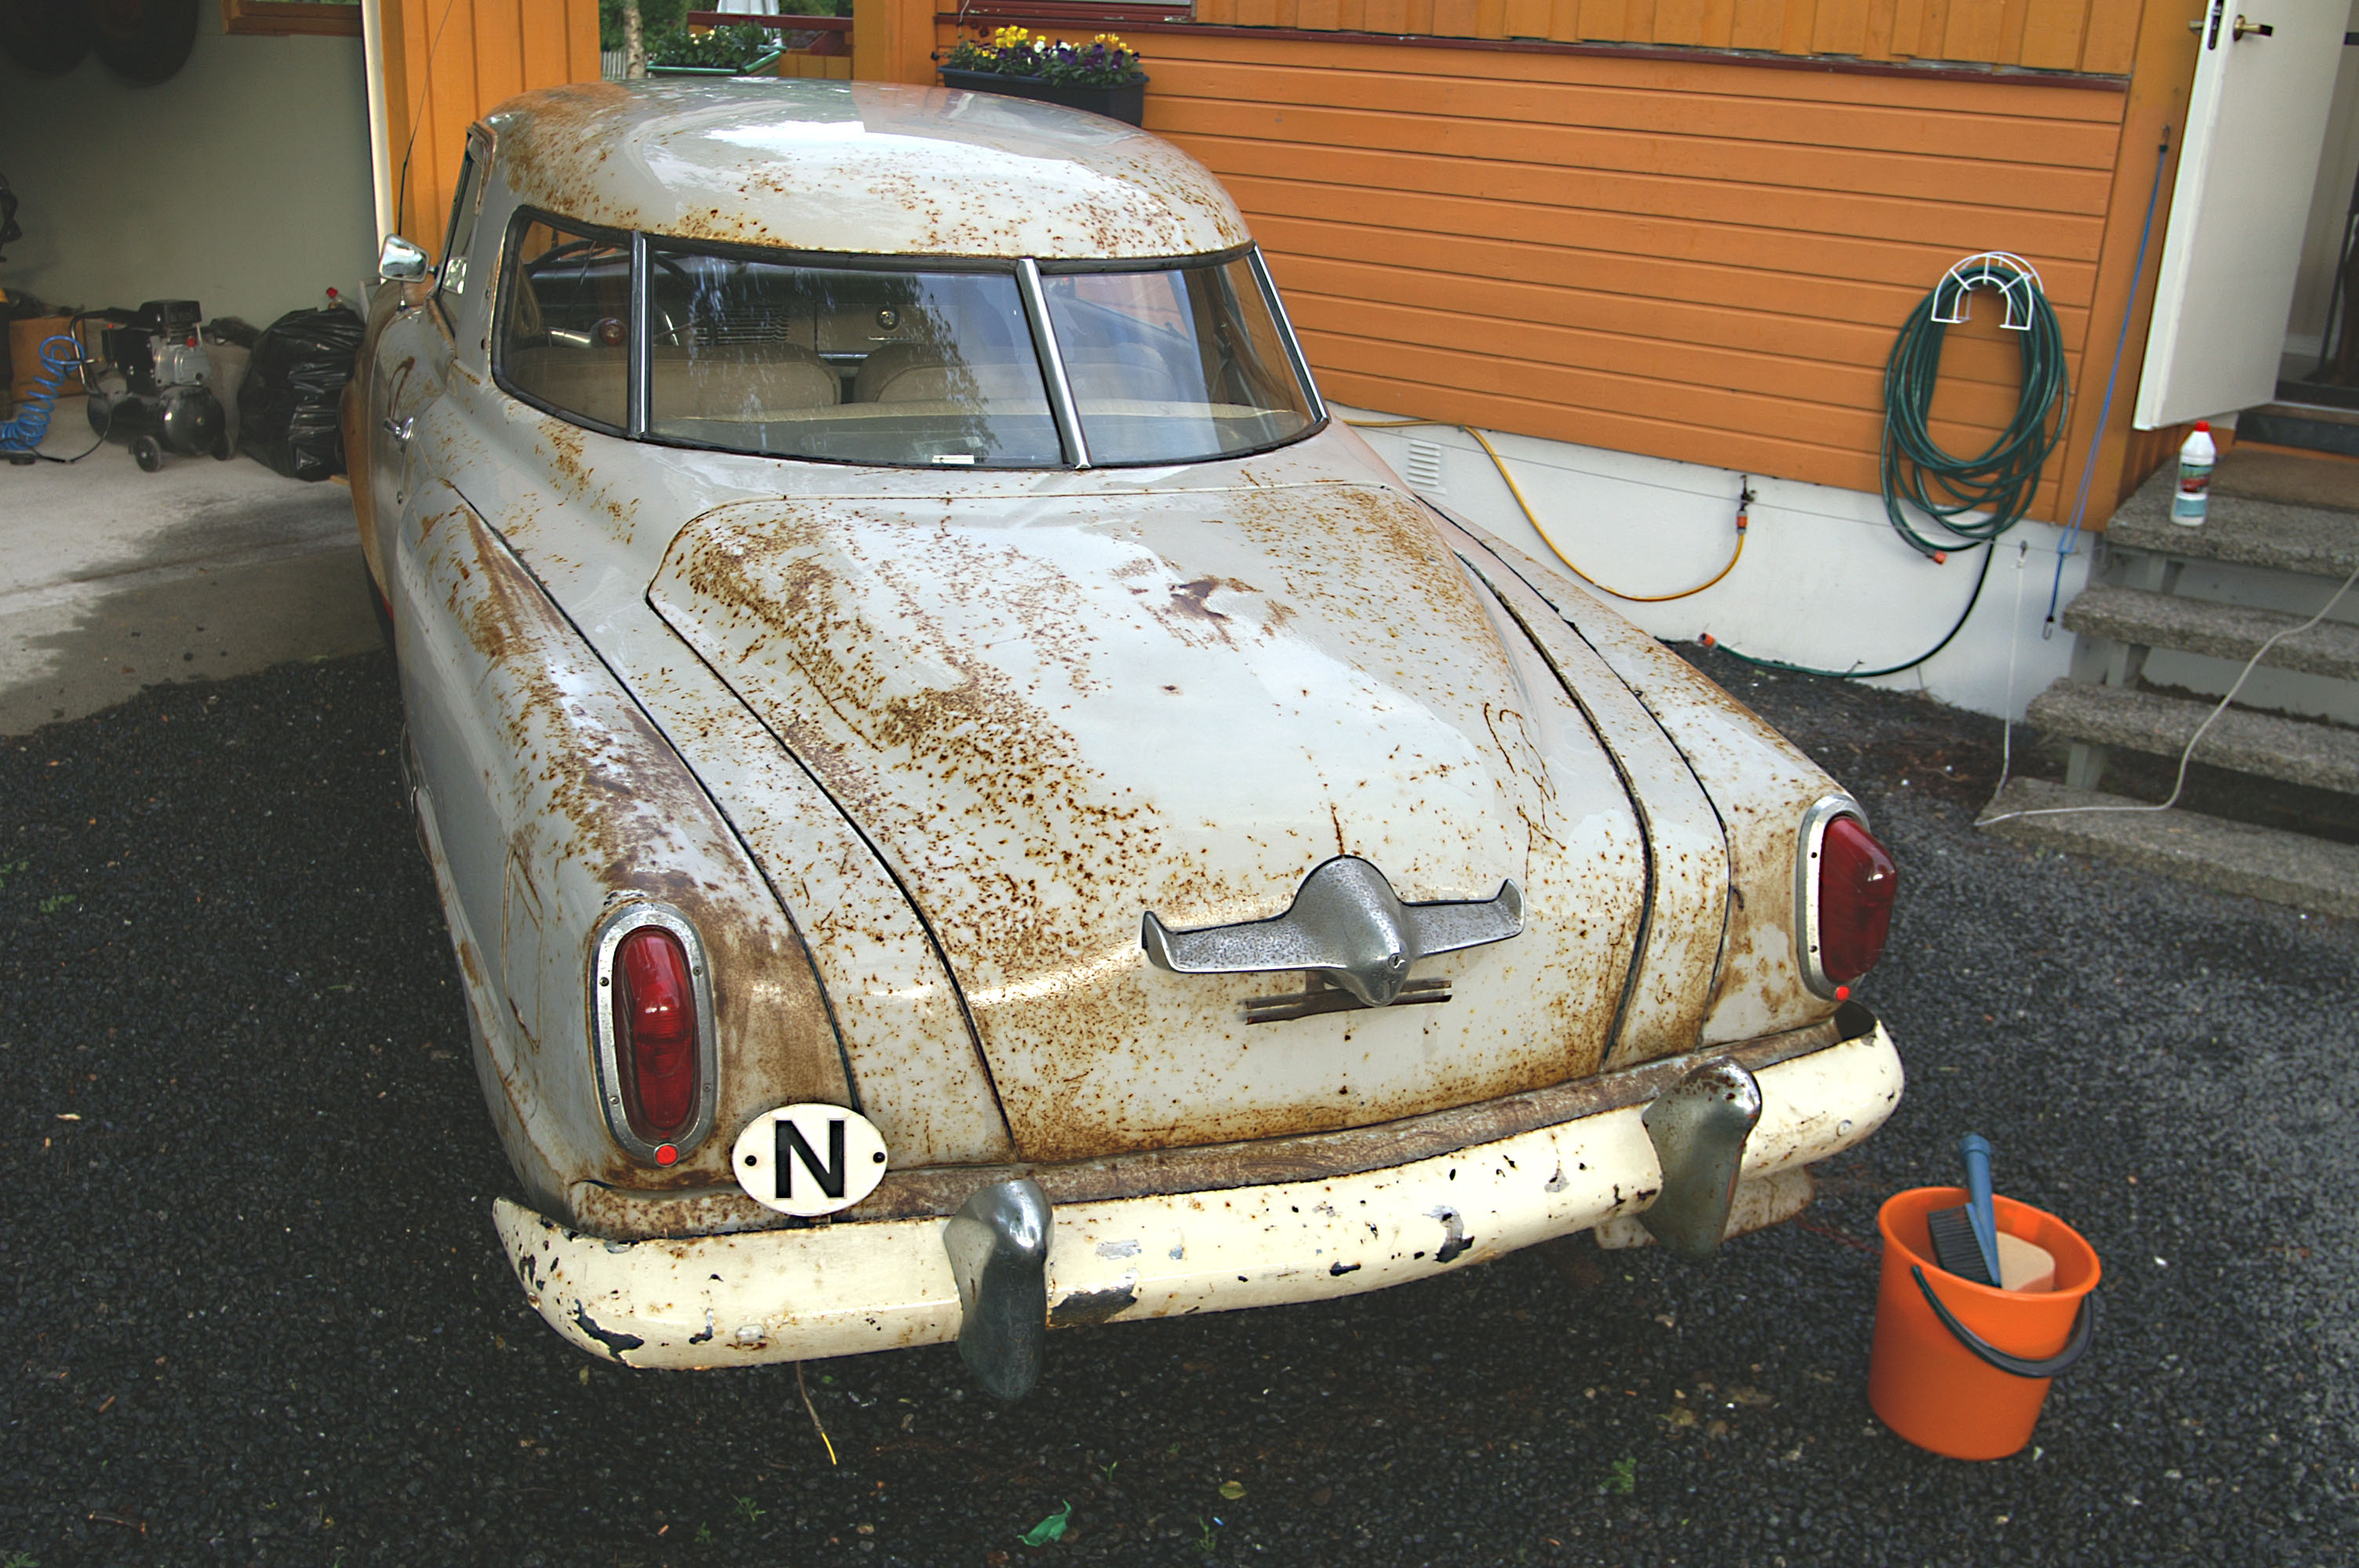
The first picture is after I've dug the car out of all kinds of garbage. Next picture is the car cleared of all the stuff that covered it. The next step is to get it home in my garage and to start work with it.
In the photo you see a small compressor.
It was so narrow that I had problem to try to change the wheel, so I decided
to try to blow up the wheels. The car had been standing with no air in the wheels
for more than 35 years (since the car was placed in the car shed). So I turned on
the compressor and started blowing up the wheels. It was a miracle, the rubber
in the wheels was still good and the wheels kept the air. And that was after
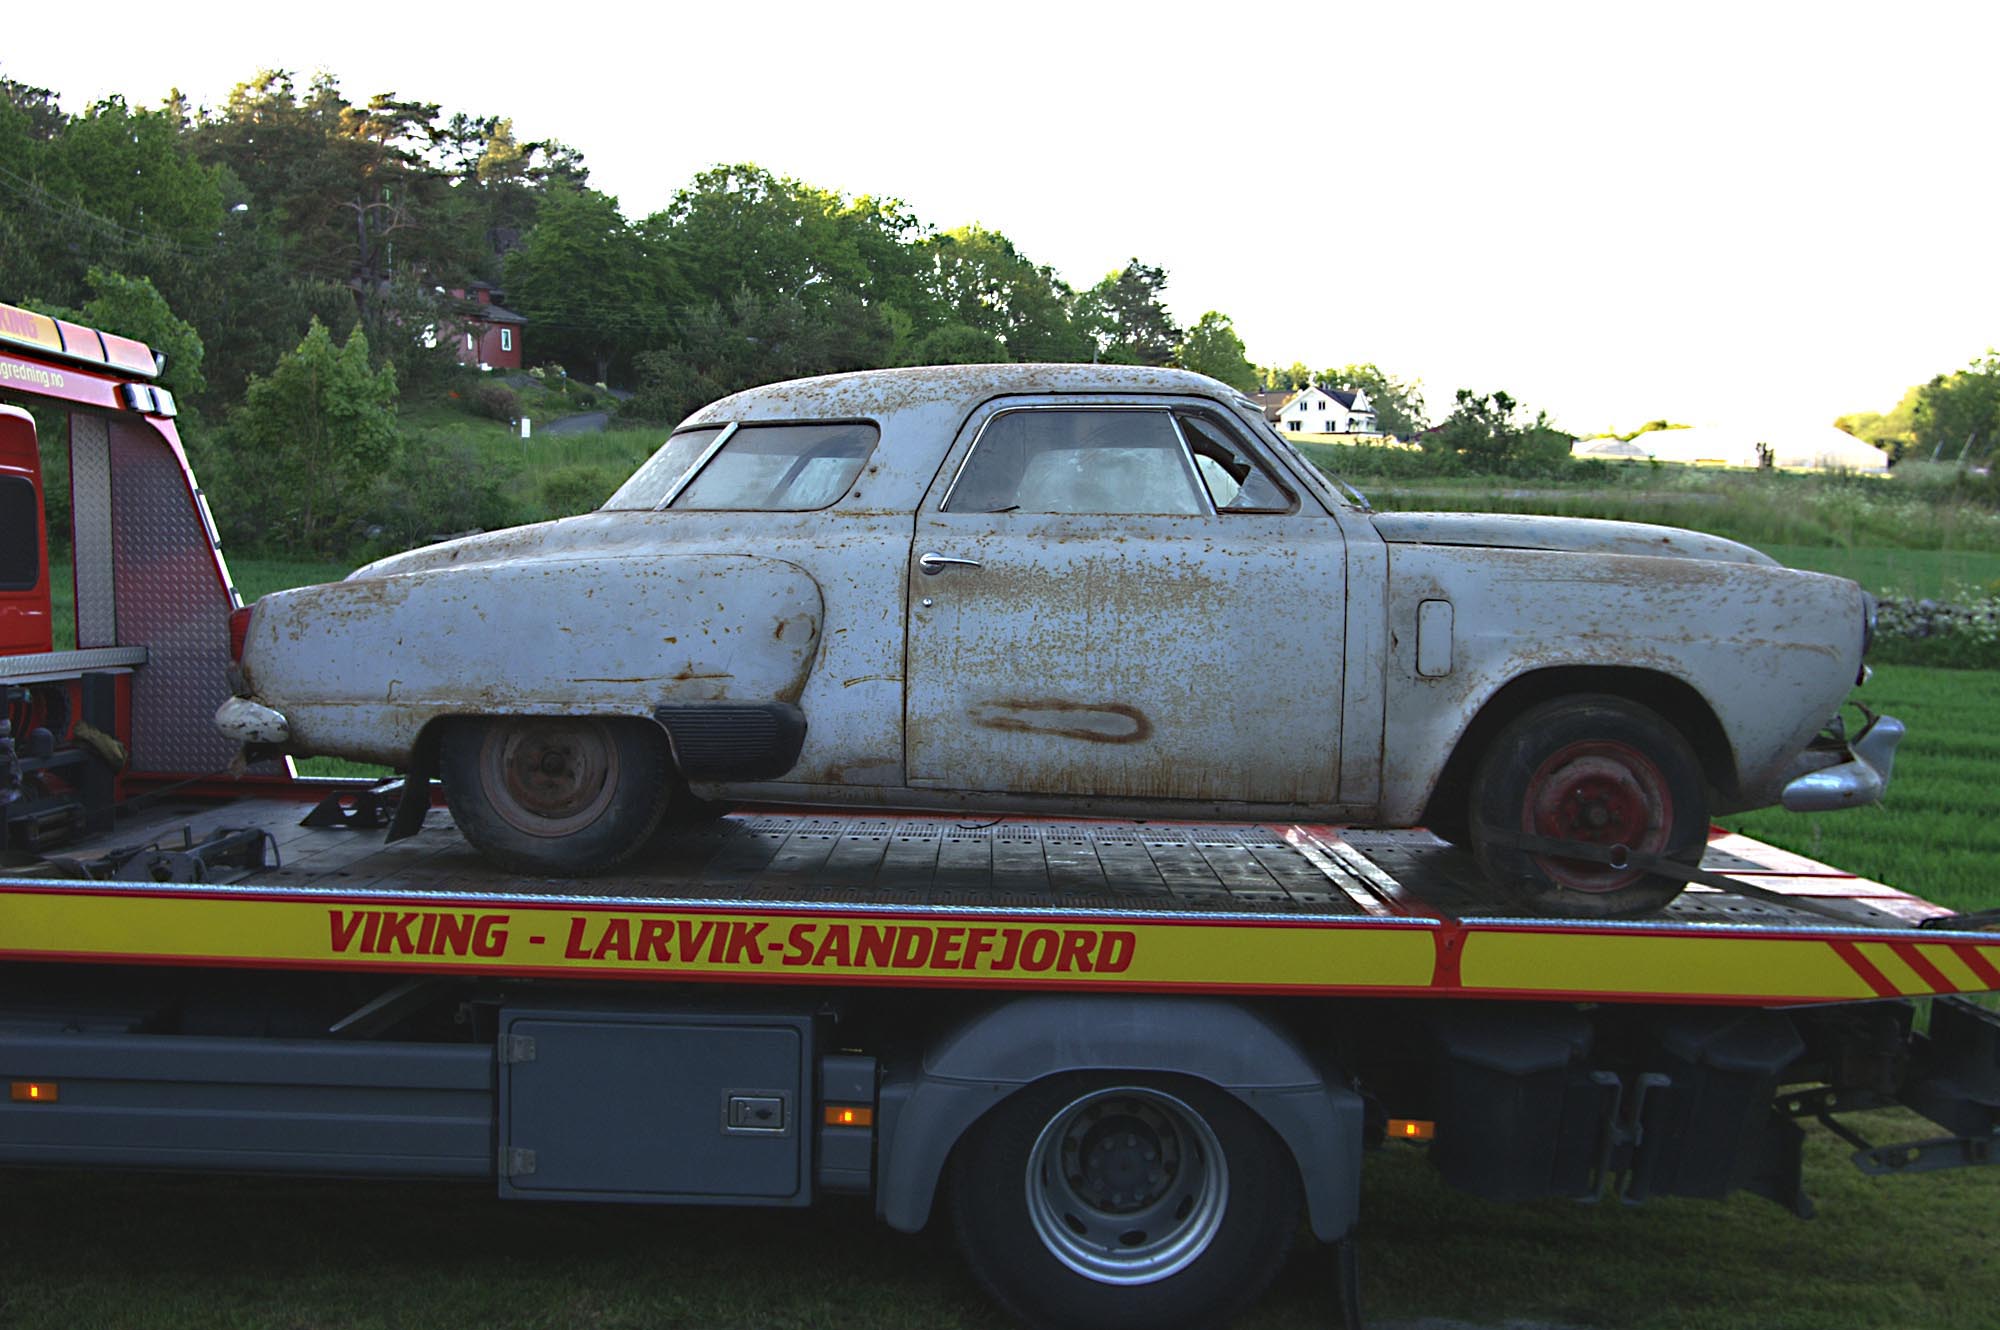
38 years! Here is the car on the tow truck. It's a beautiful car, or hopefully it will be that when I'm finished. I'm on the net and looking at photos of these cars, and I can only say they are very nice. A photo of the front and you can see that the bullet nose is missing
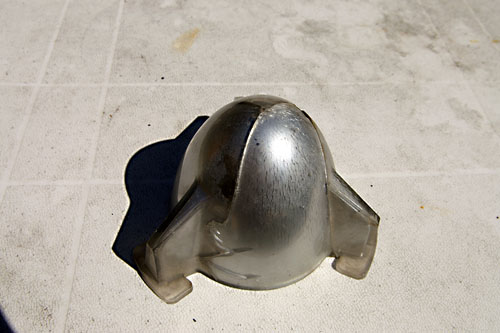
But here is the bullet nose.
Home at last.
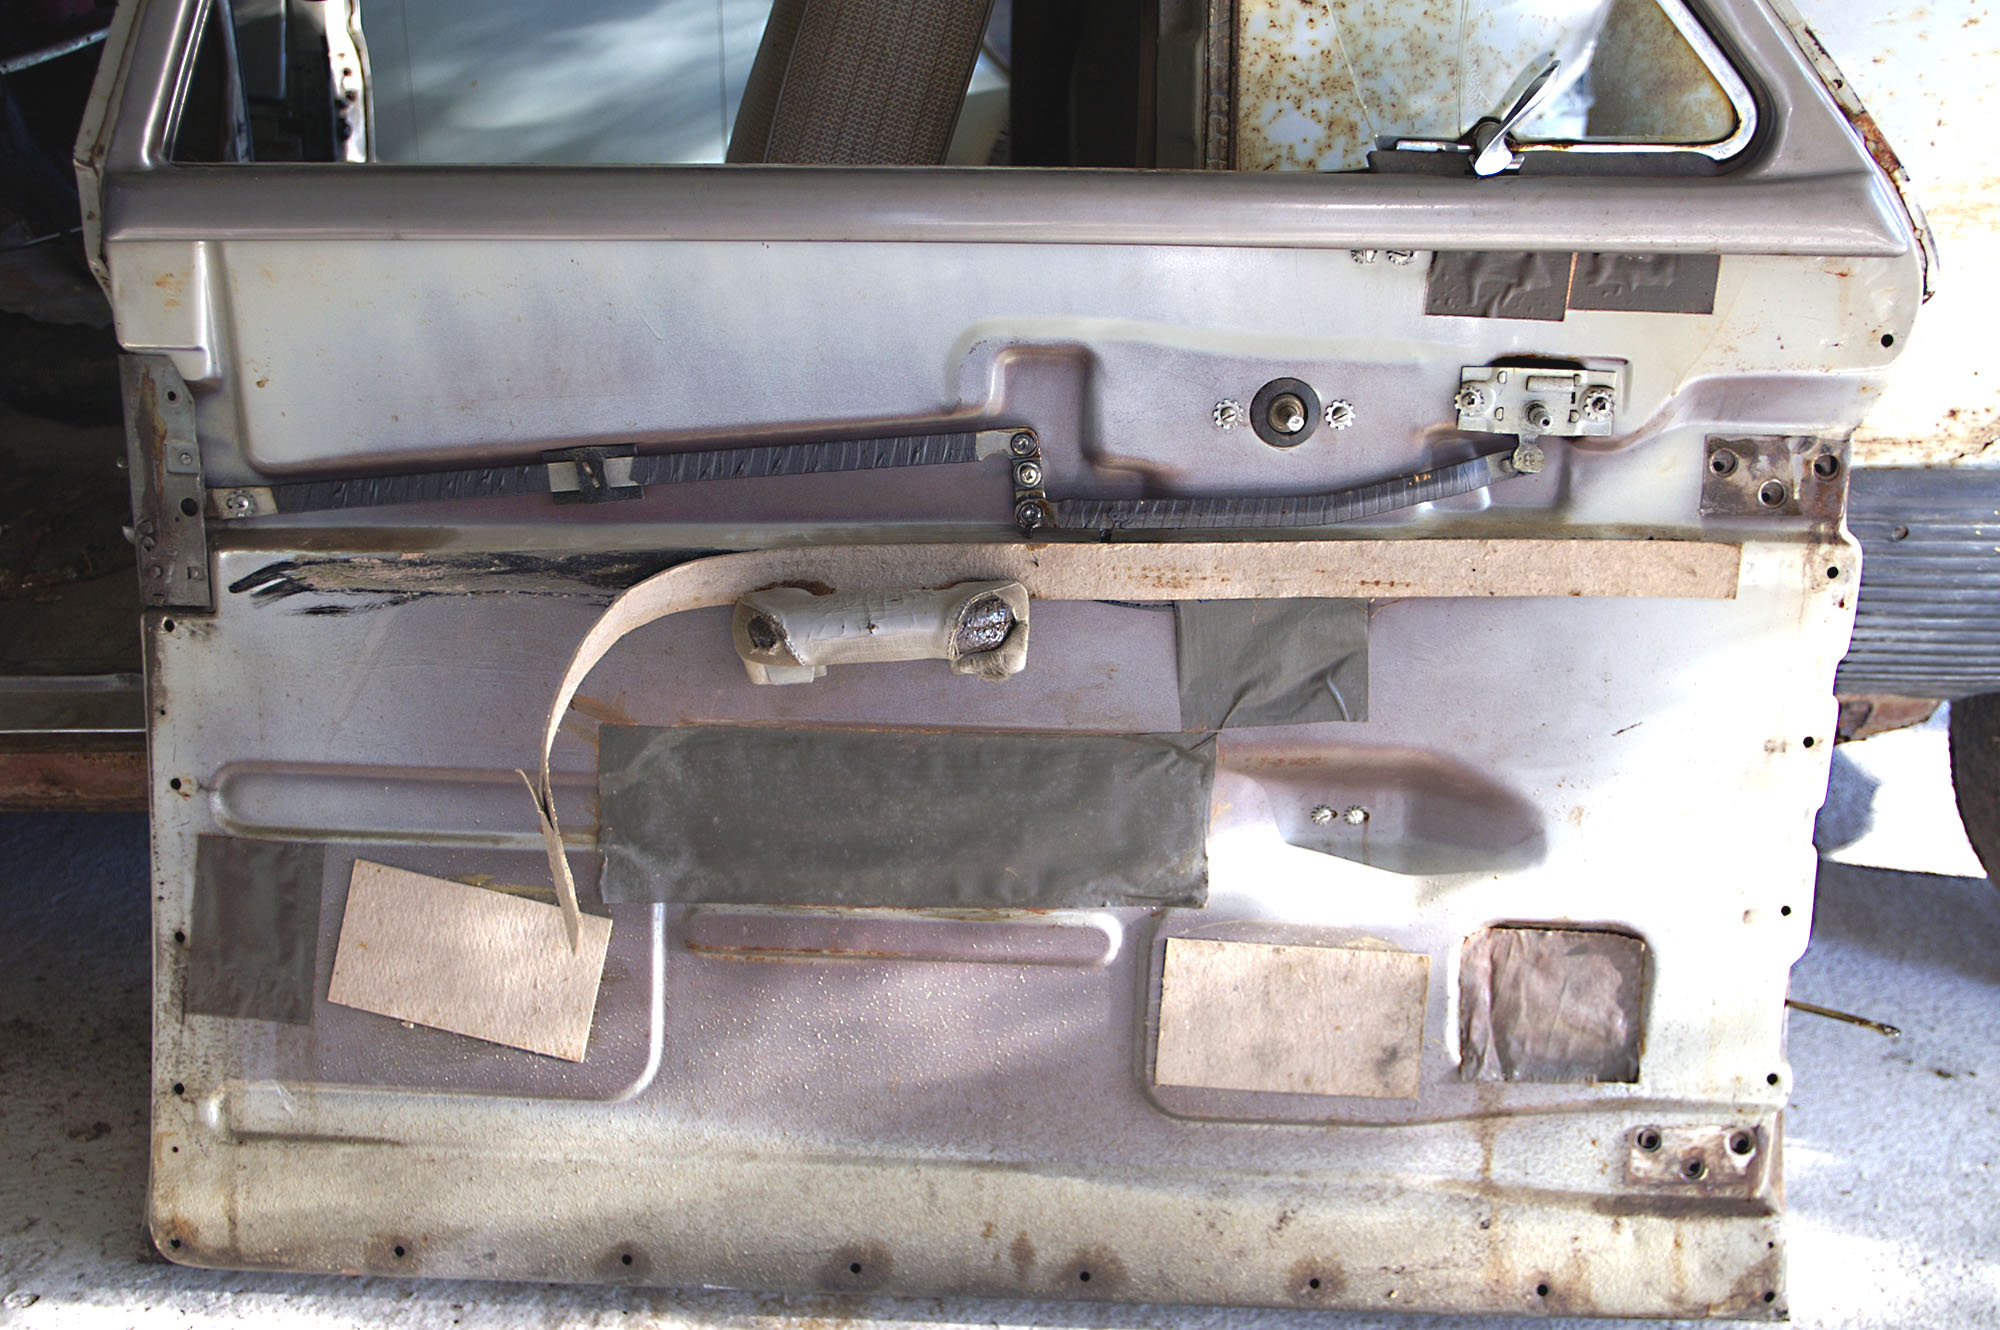
Then a little soap and water, and things looks better. Then, after placing the car into the garage, I have started the dismounting. I started with the door panels and then I took off the doors and the hood. It was a hell of a job to get the doors off, not both, but one of the screws in the right door hing was a hell to get loose. It took me two days to loosen it, even with a lot of penetrating oil. I used an impact puller, spraying on penetrating oil and tried again, left it and tried again. I thought I would have to drill out the screw, but I thought I would have a last go, and then it came loose. I'm also about to split the doors so I can check the lifts for the windows. They were working good, but I still wanted to open them up to see how they looked and to clean inside. Then I'm going to sandblast the doors and prime them. This is what I'm going to do with some of the other things too.
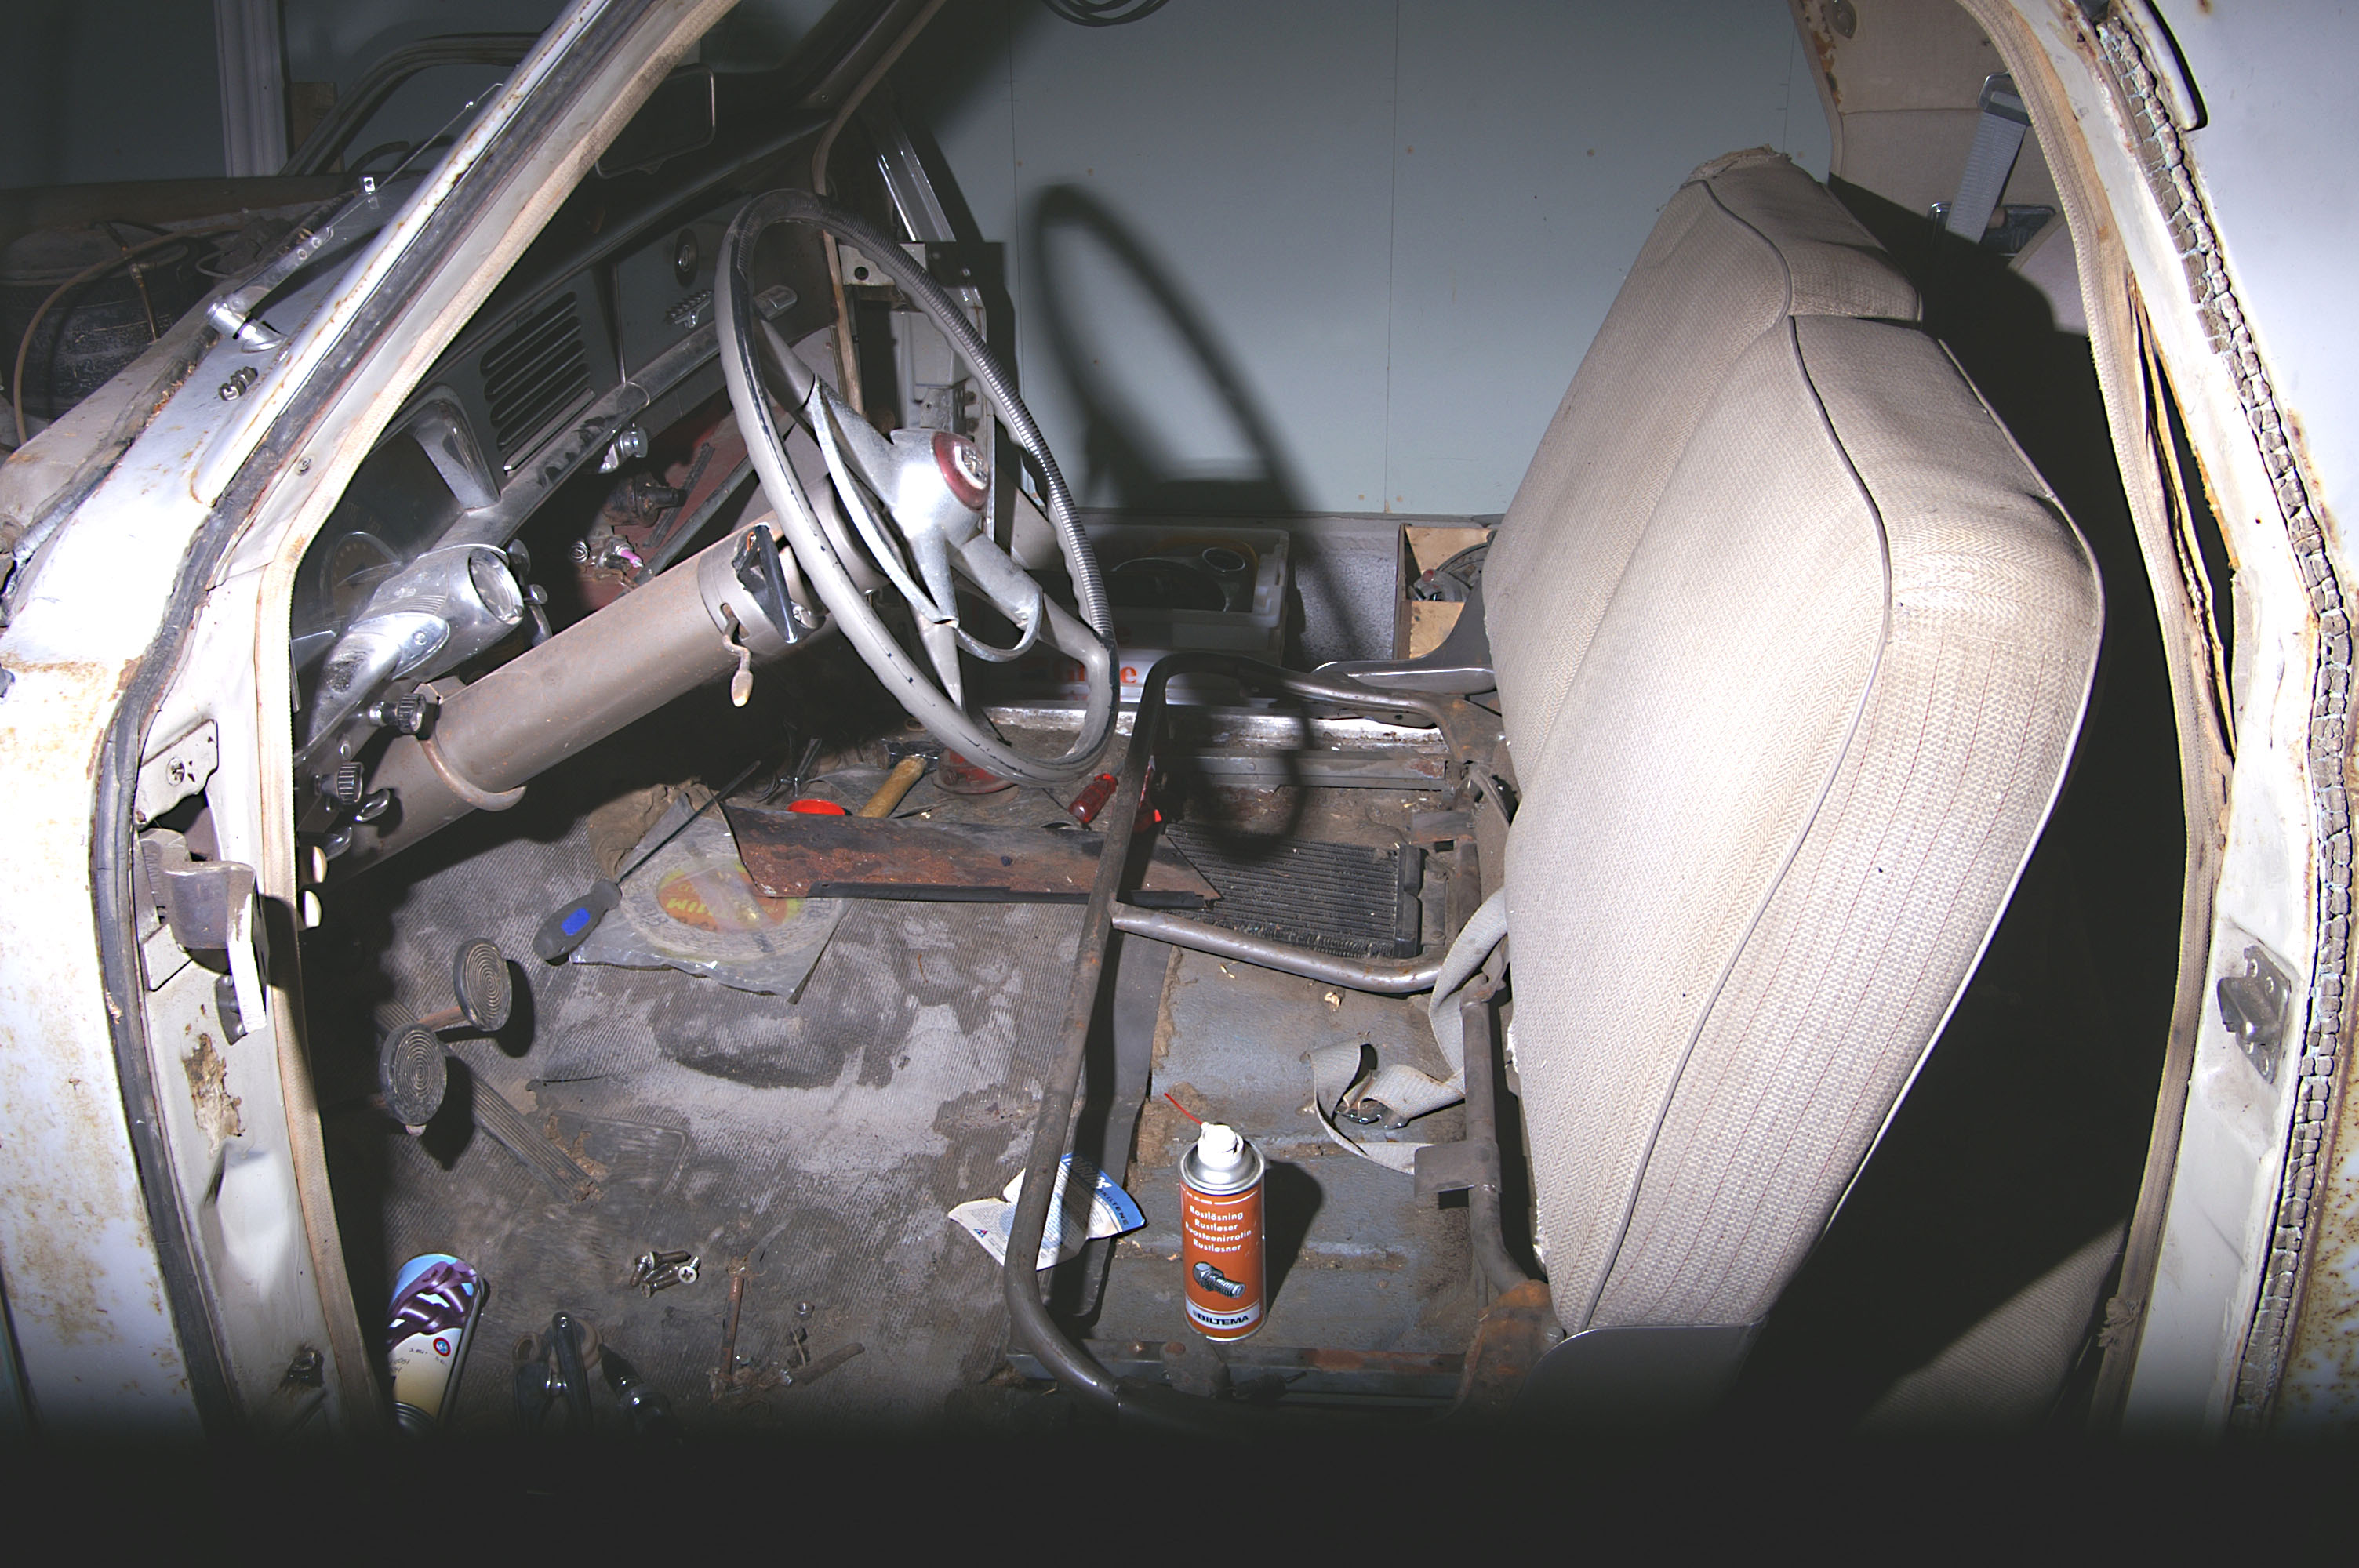
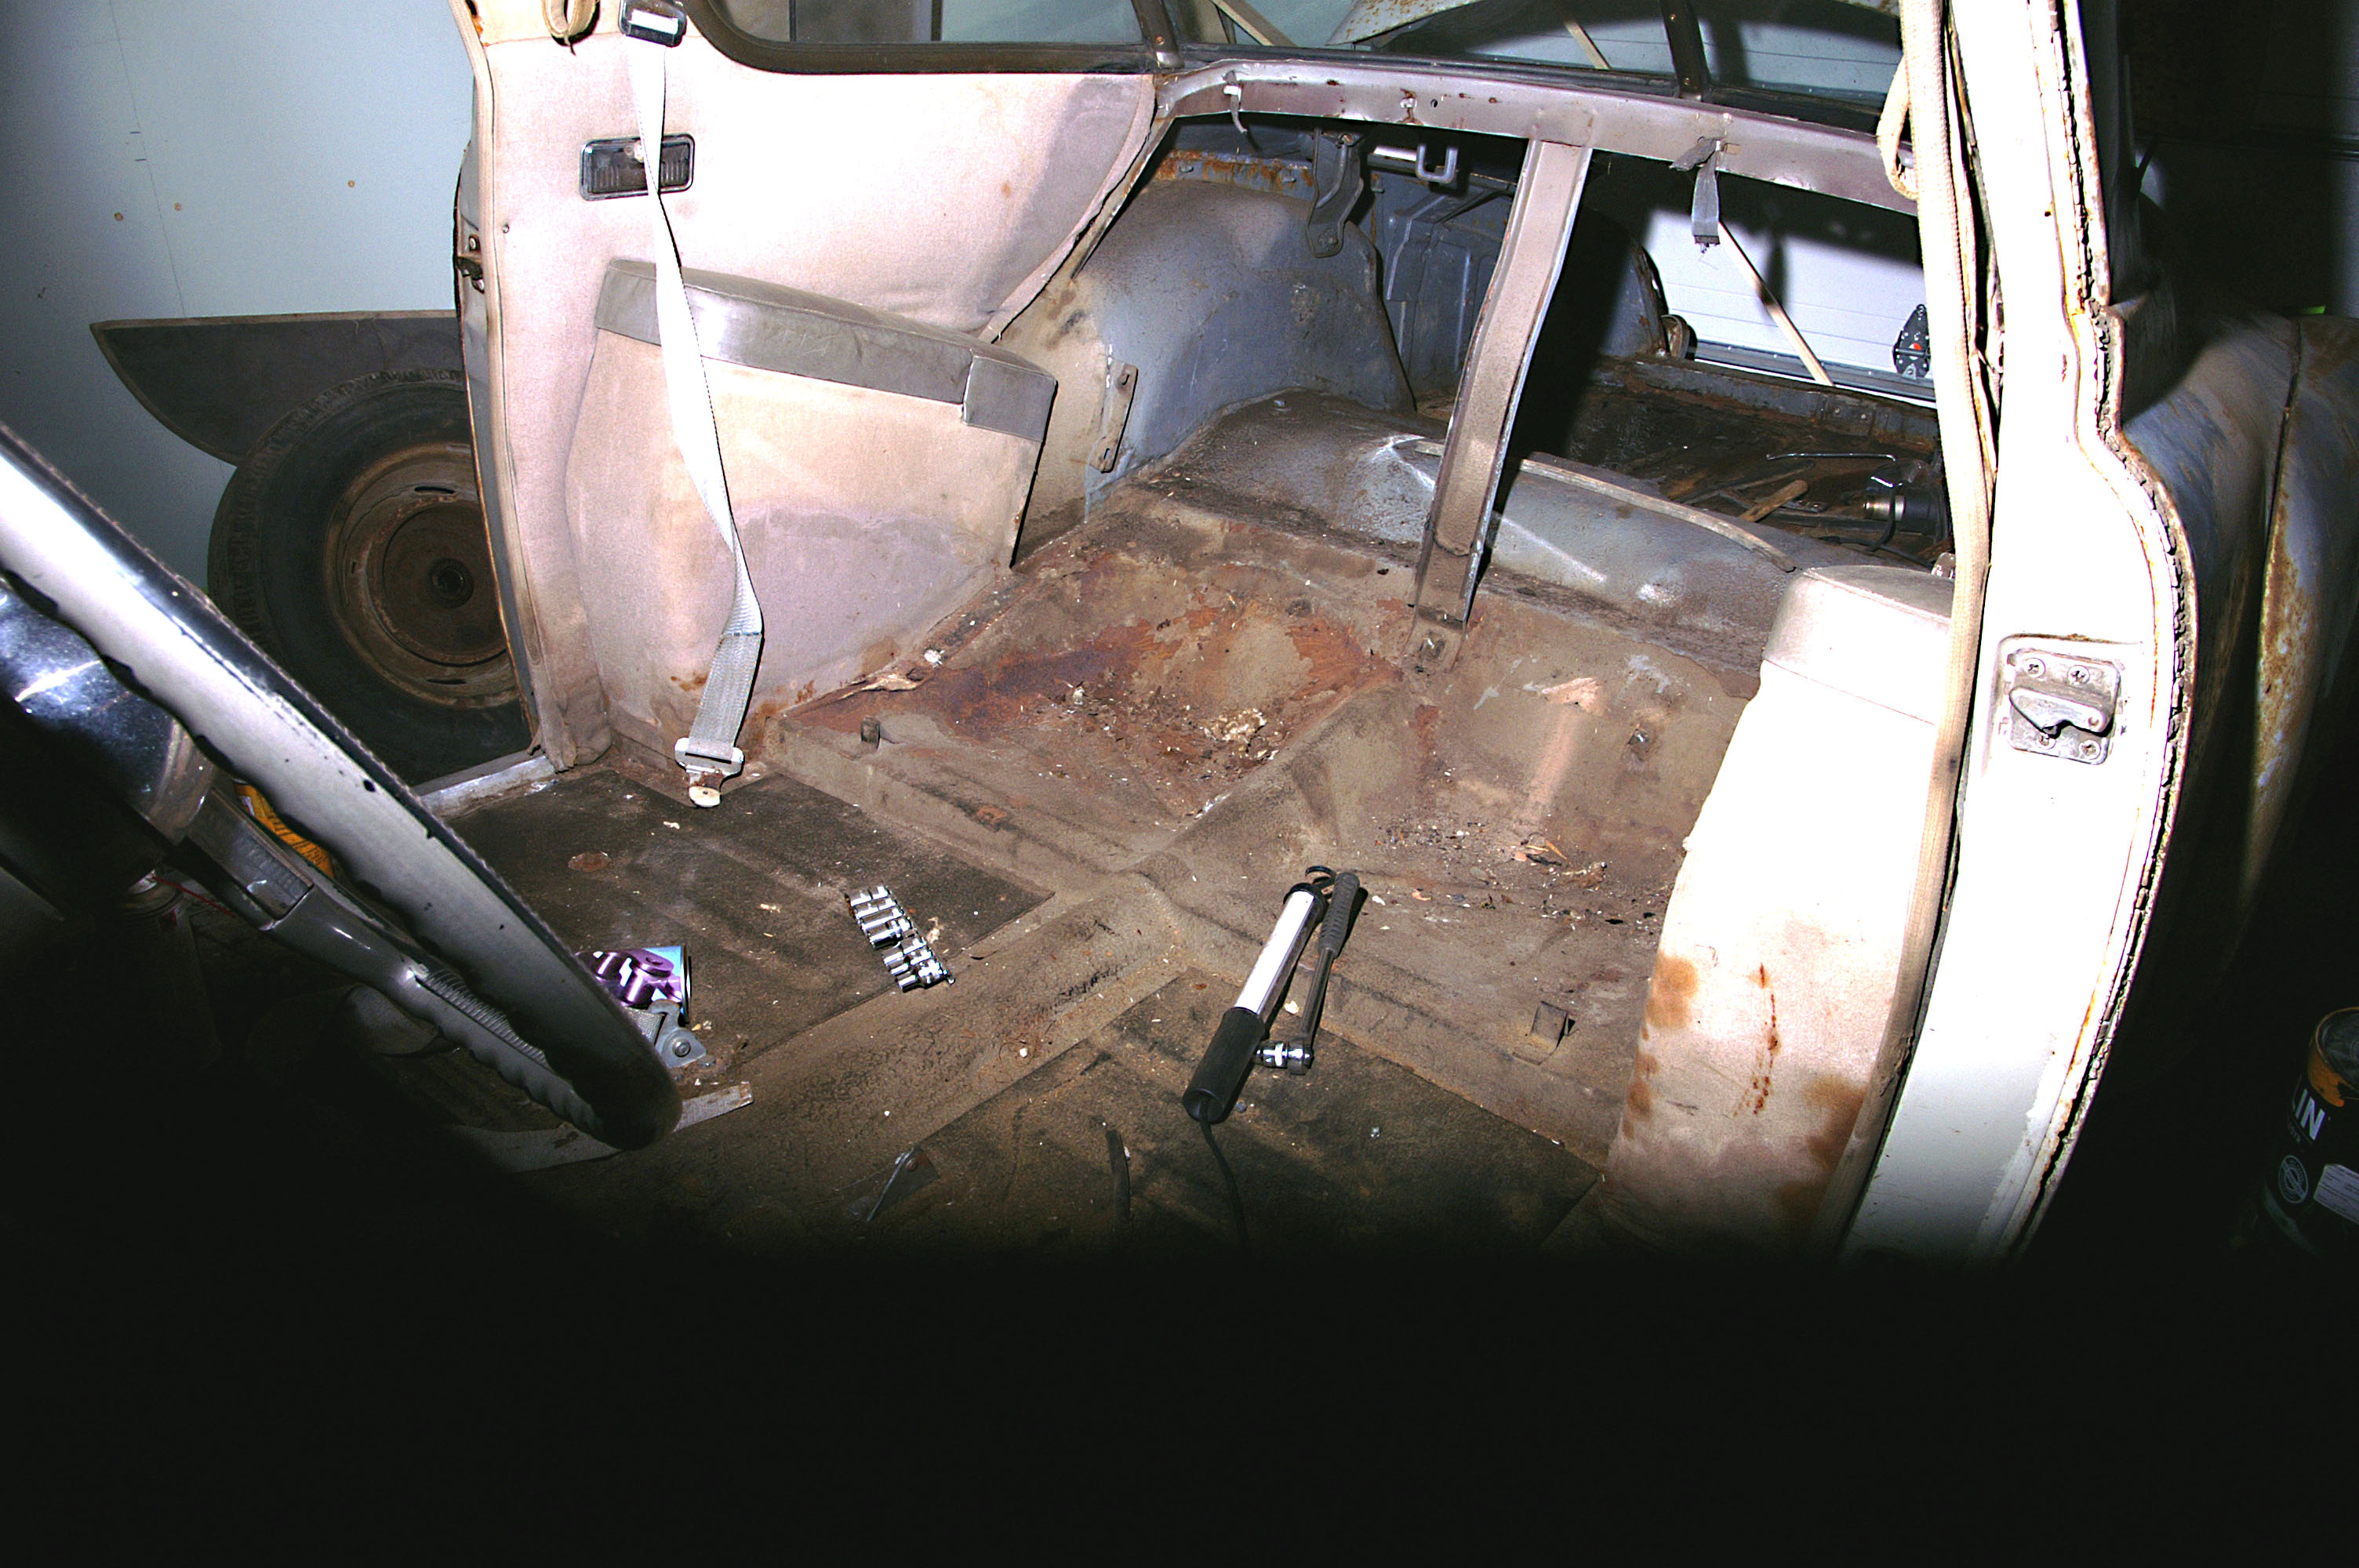
A view into the coupe. I have started dismounting the seats and they need new textiles. There have been some mice having a good time in the seats.
So there will be a lot of work and I will try to tell you how things are going further. The four bolts that were on the seat frame did not come out easily. It took me a couple of days and some sweat. So now the seats are out and I'm going to clear the floor to see how this looks beneath the mats. After that I'm going to clean it and prime the floor. I did get out the seats and even the back of the back seat, so now I can start to clean the floor. Take off the mat etc.
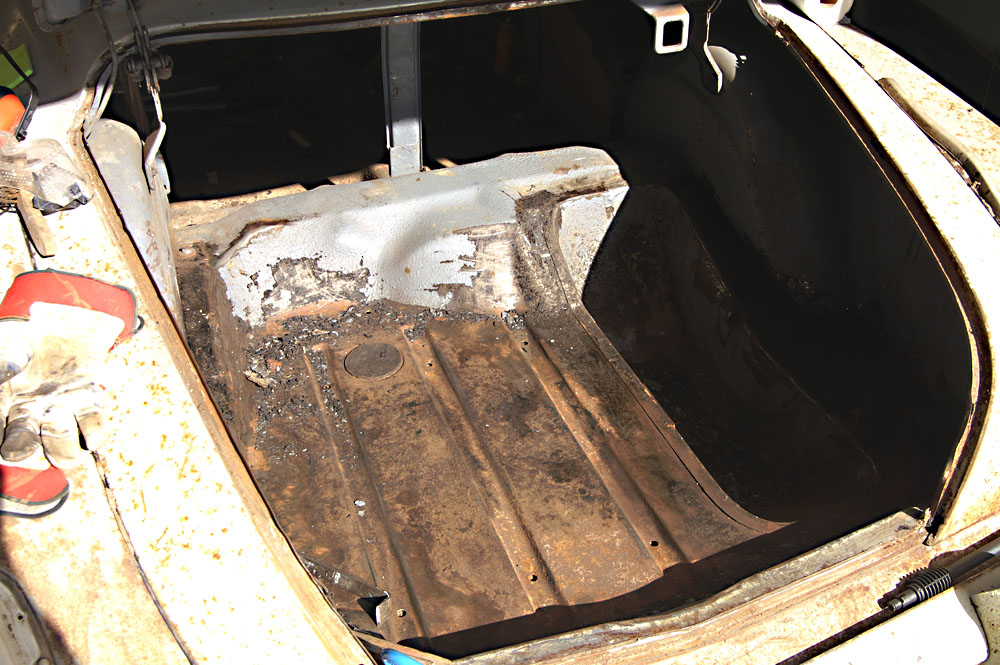
Here you can see into the car from the rear through the trunk. I have started to clear it down to the metal, then I'm going to prime the trunk. When I'm finished with the trunk, I'm going to start in the car and clear all the floor. Taking off the old mats etc. The well for the spare tire needs to be done too.
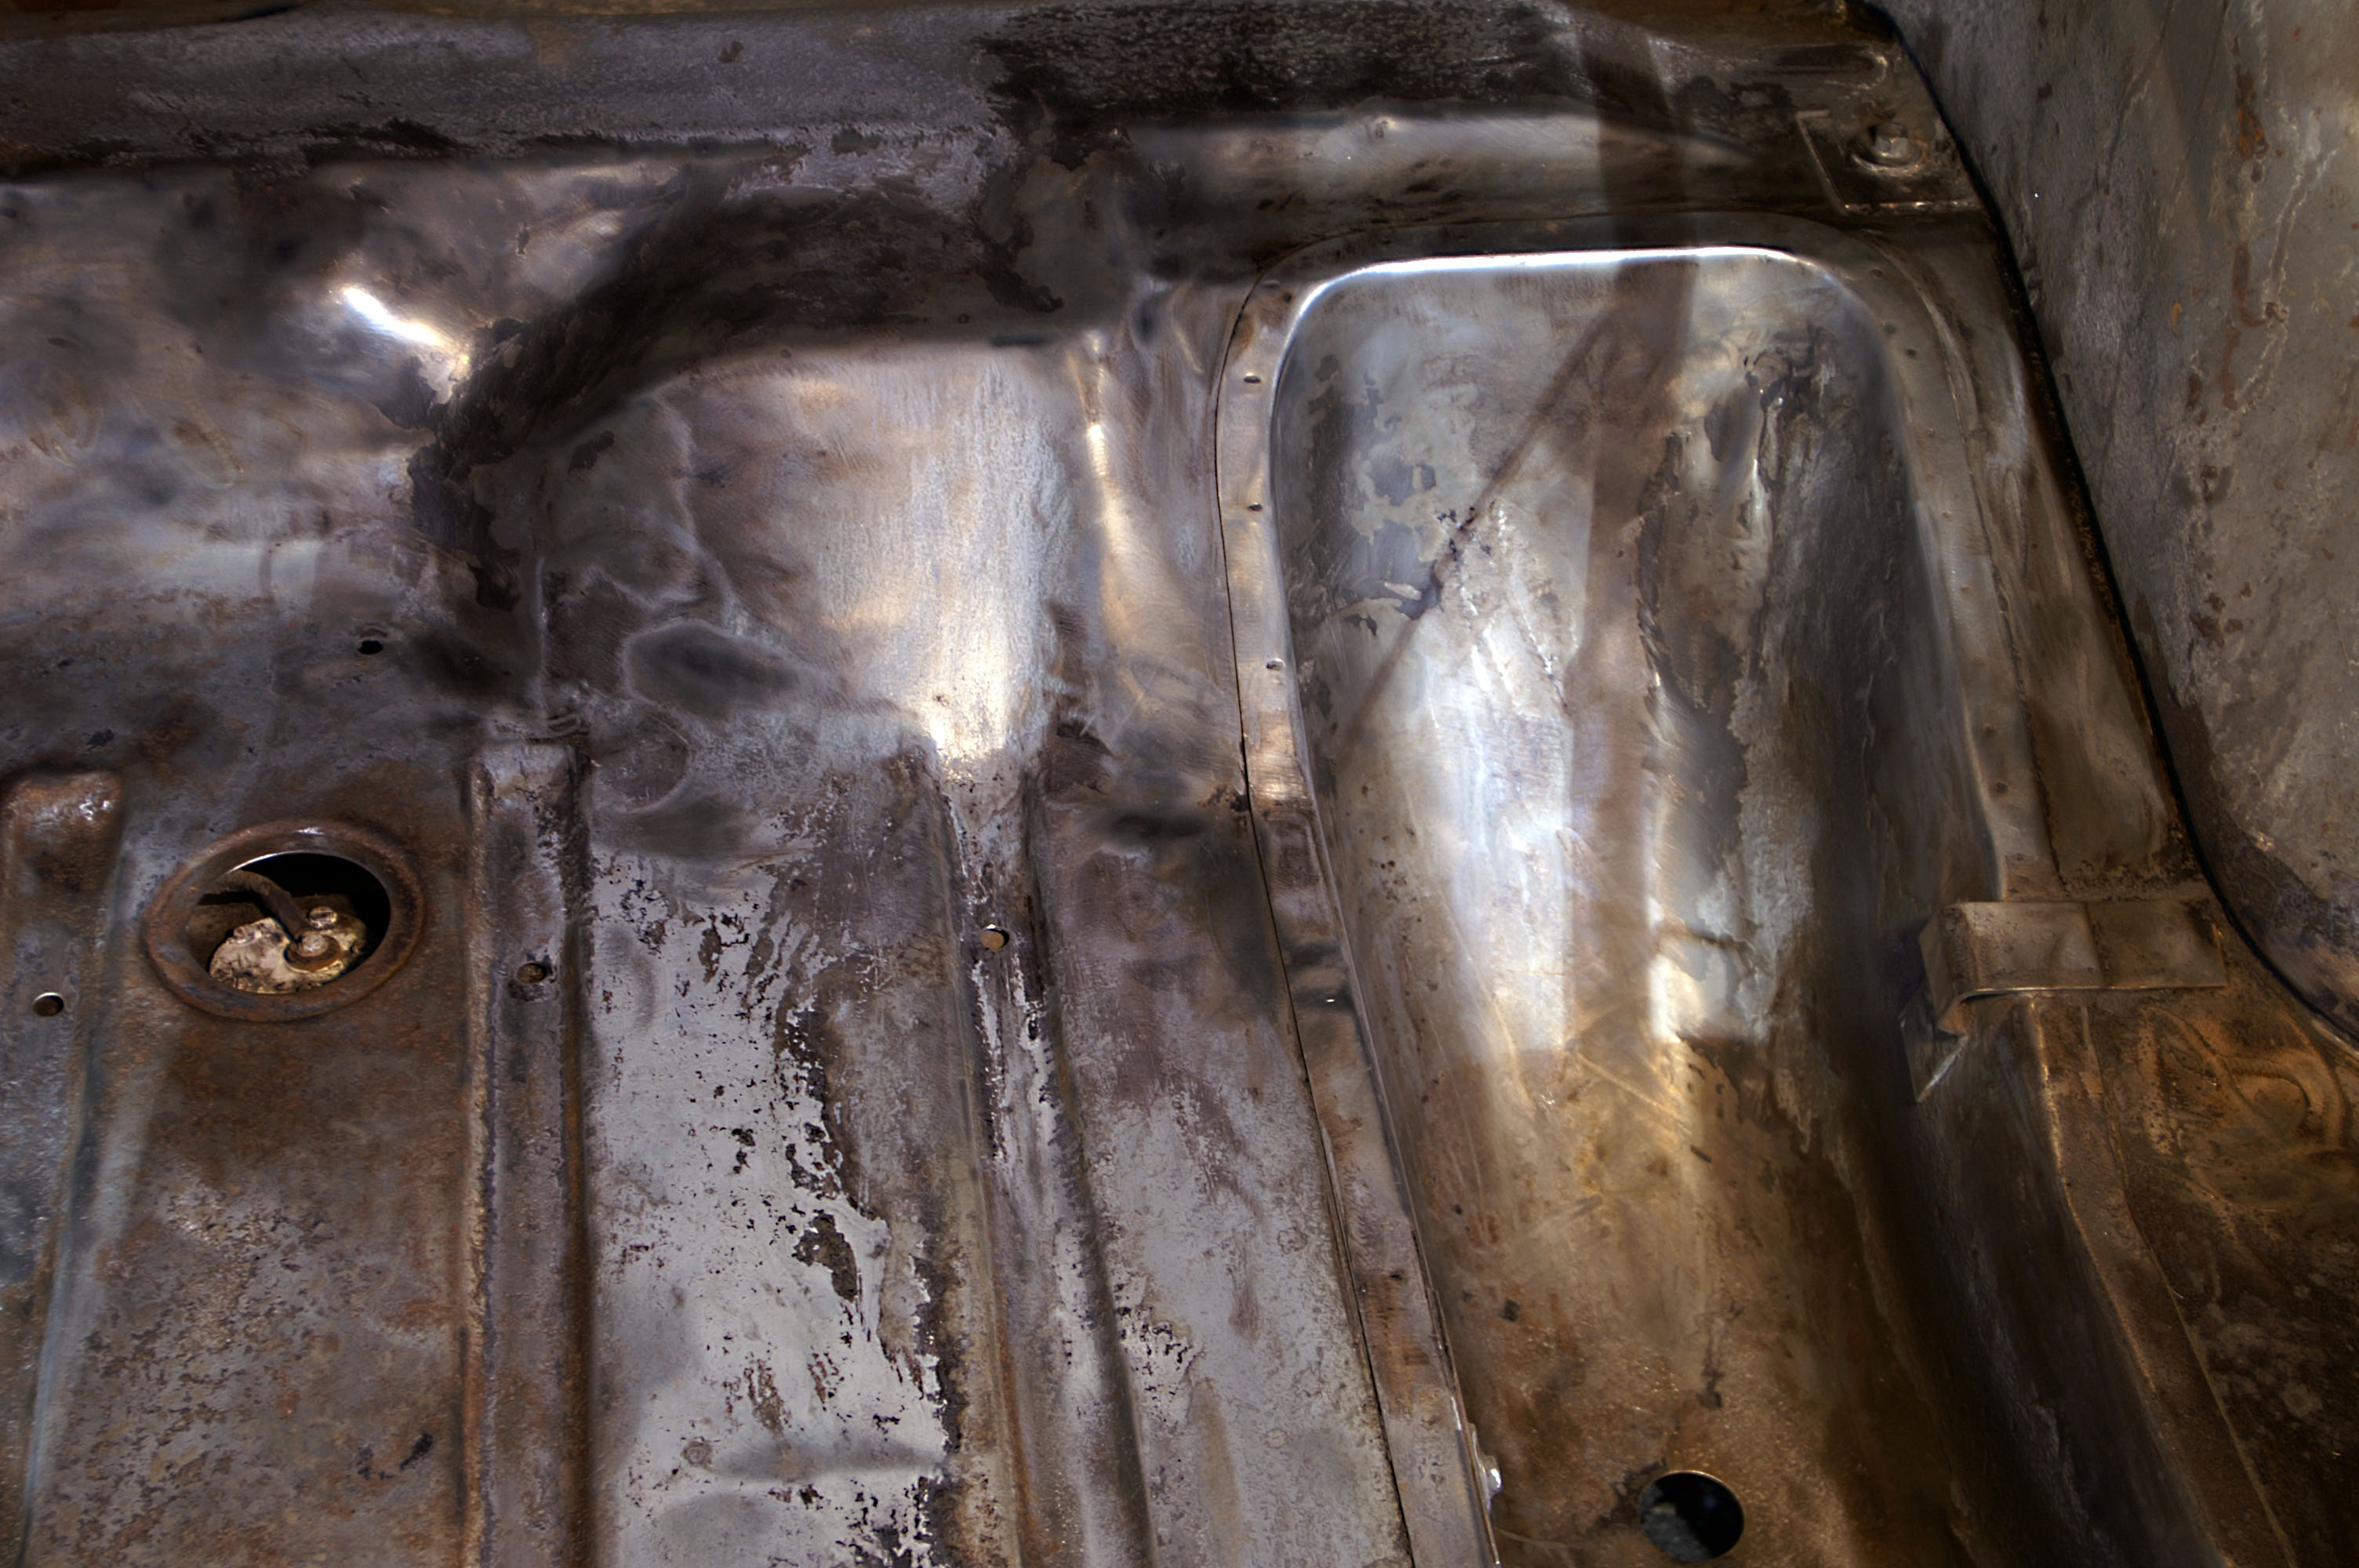
Today I've cleared the trunk of all asphalt or tar surface a lot of work and dust. Now it's shining and ready for priming. In this photo you can see that I've cleared all the asphalt/tar and painted ... it's shining
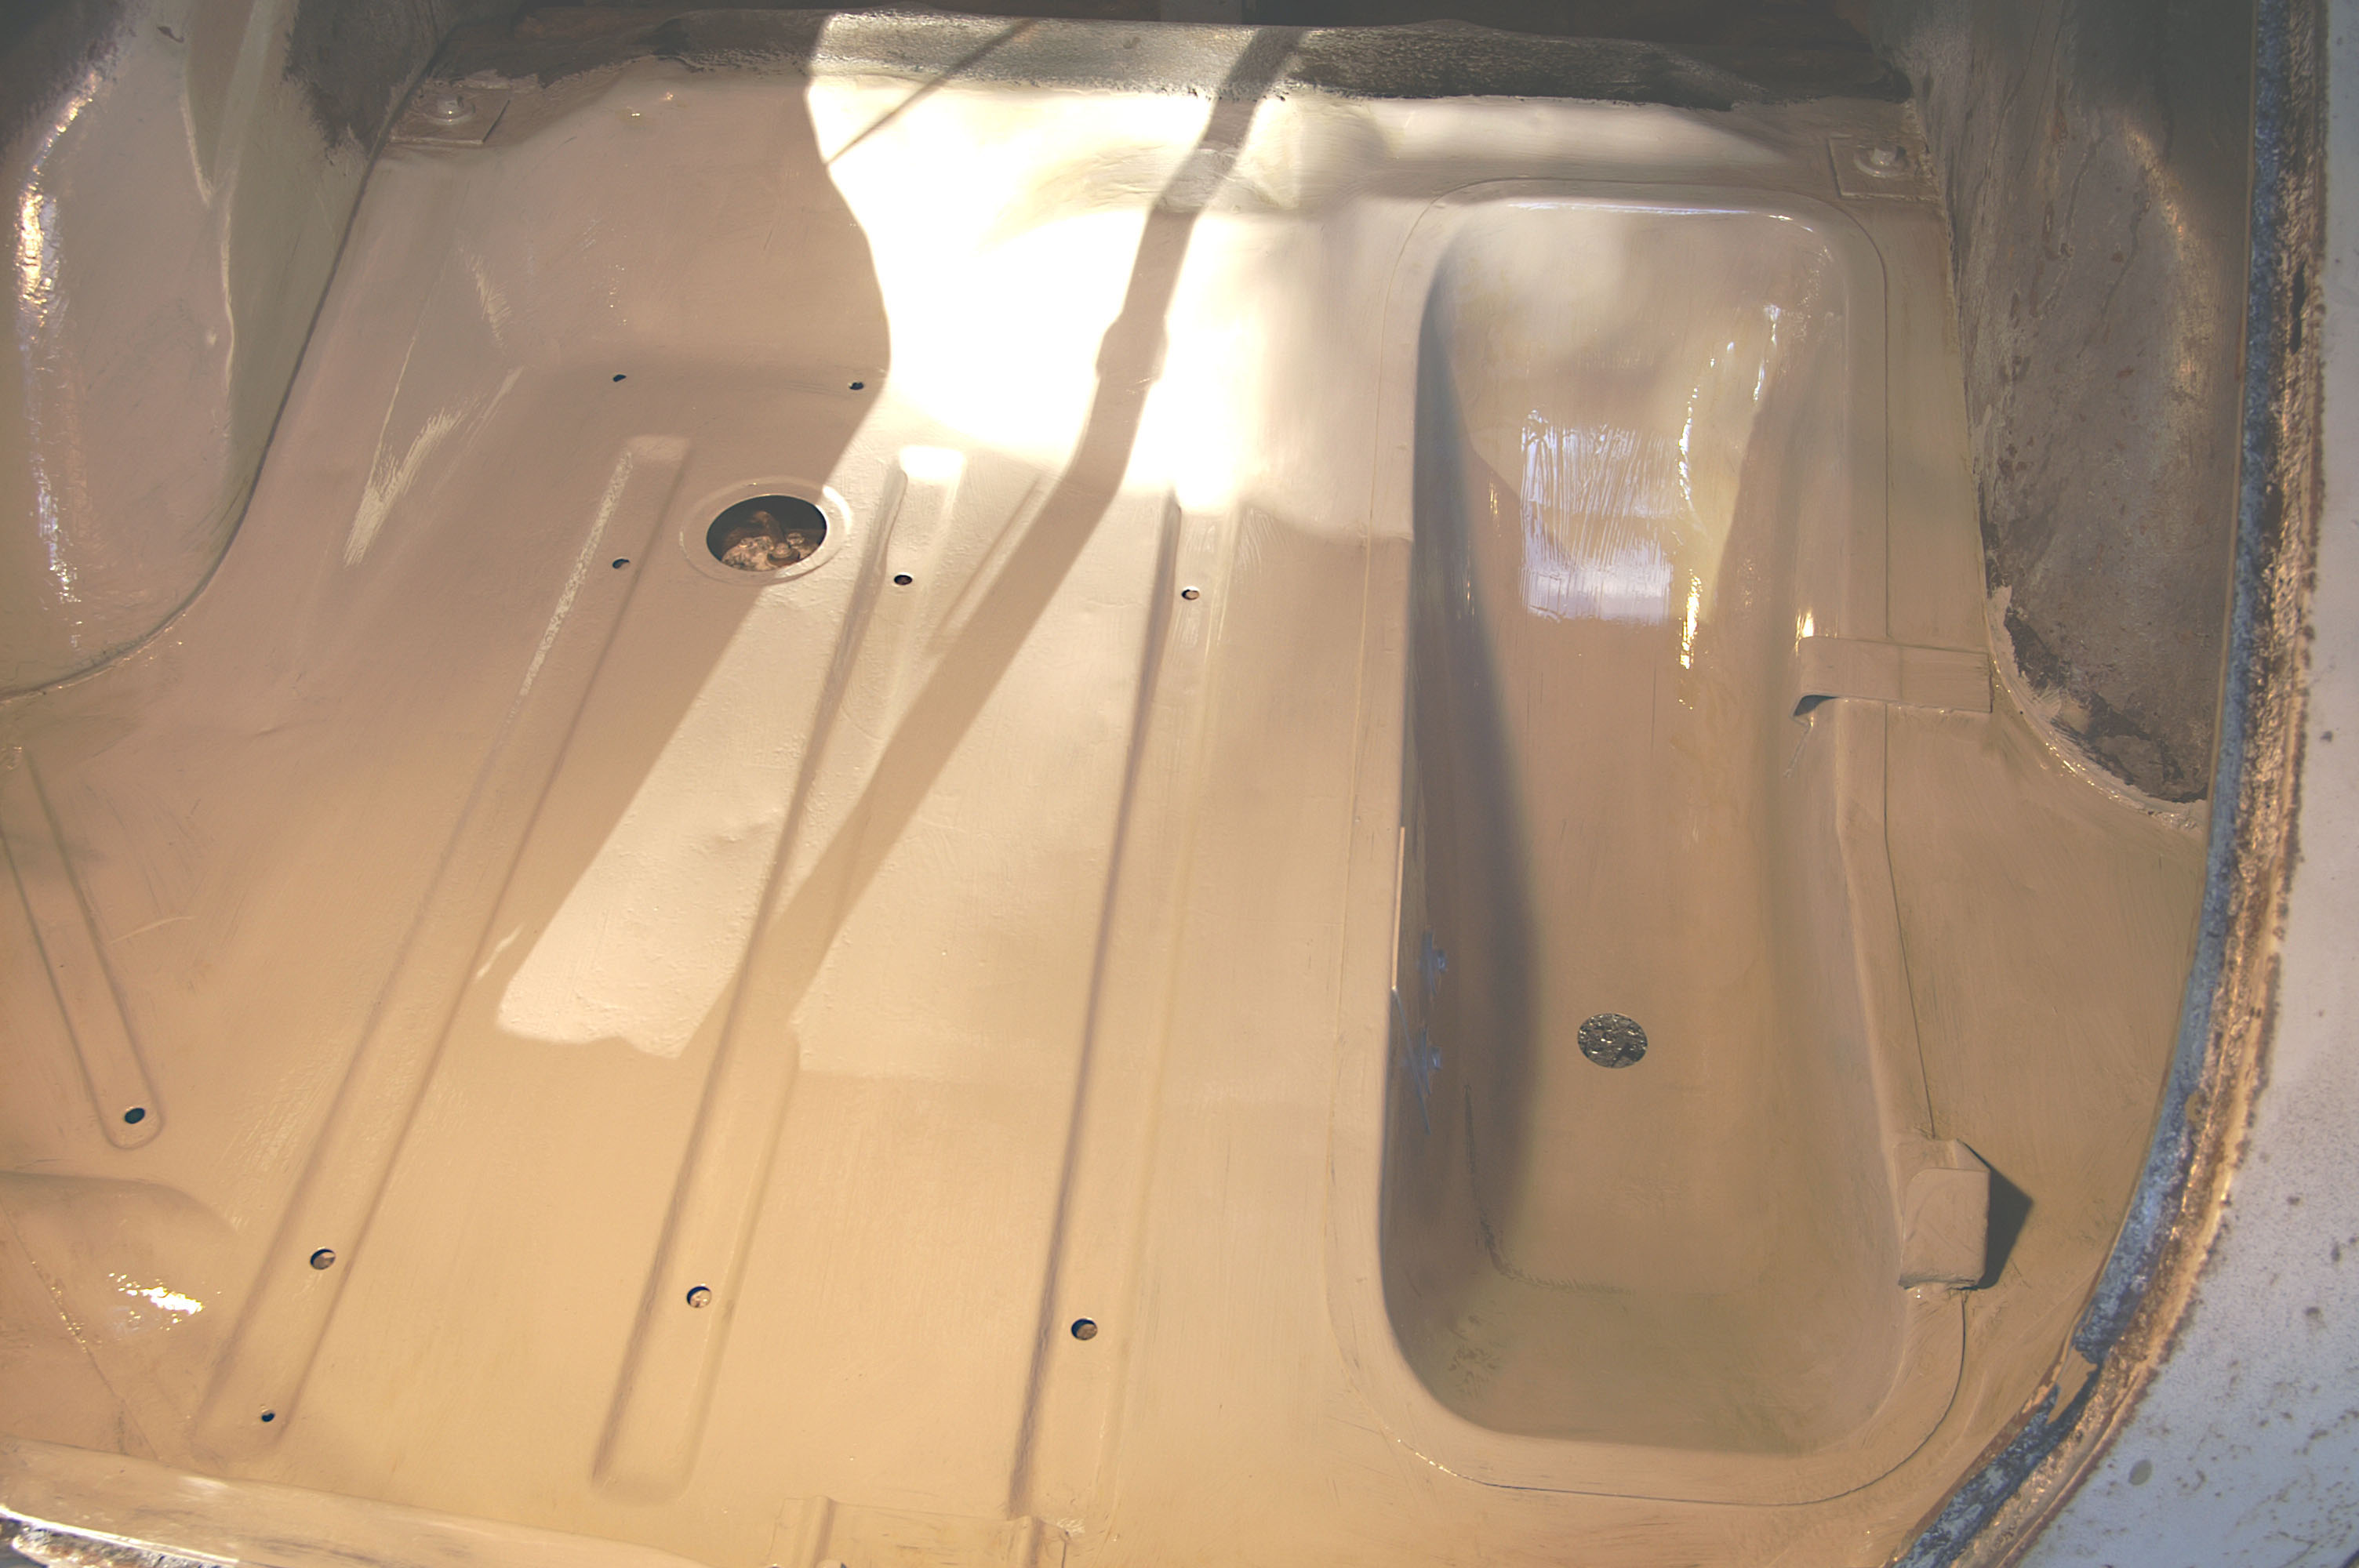
And here I have put on primer. So now the trunk looks good ... there is only the rest!
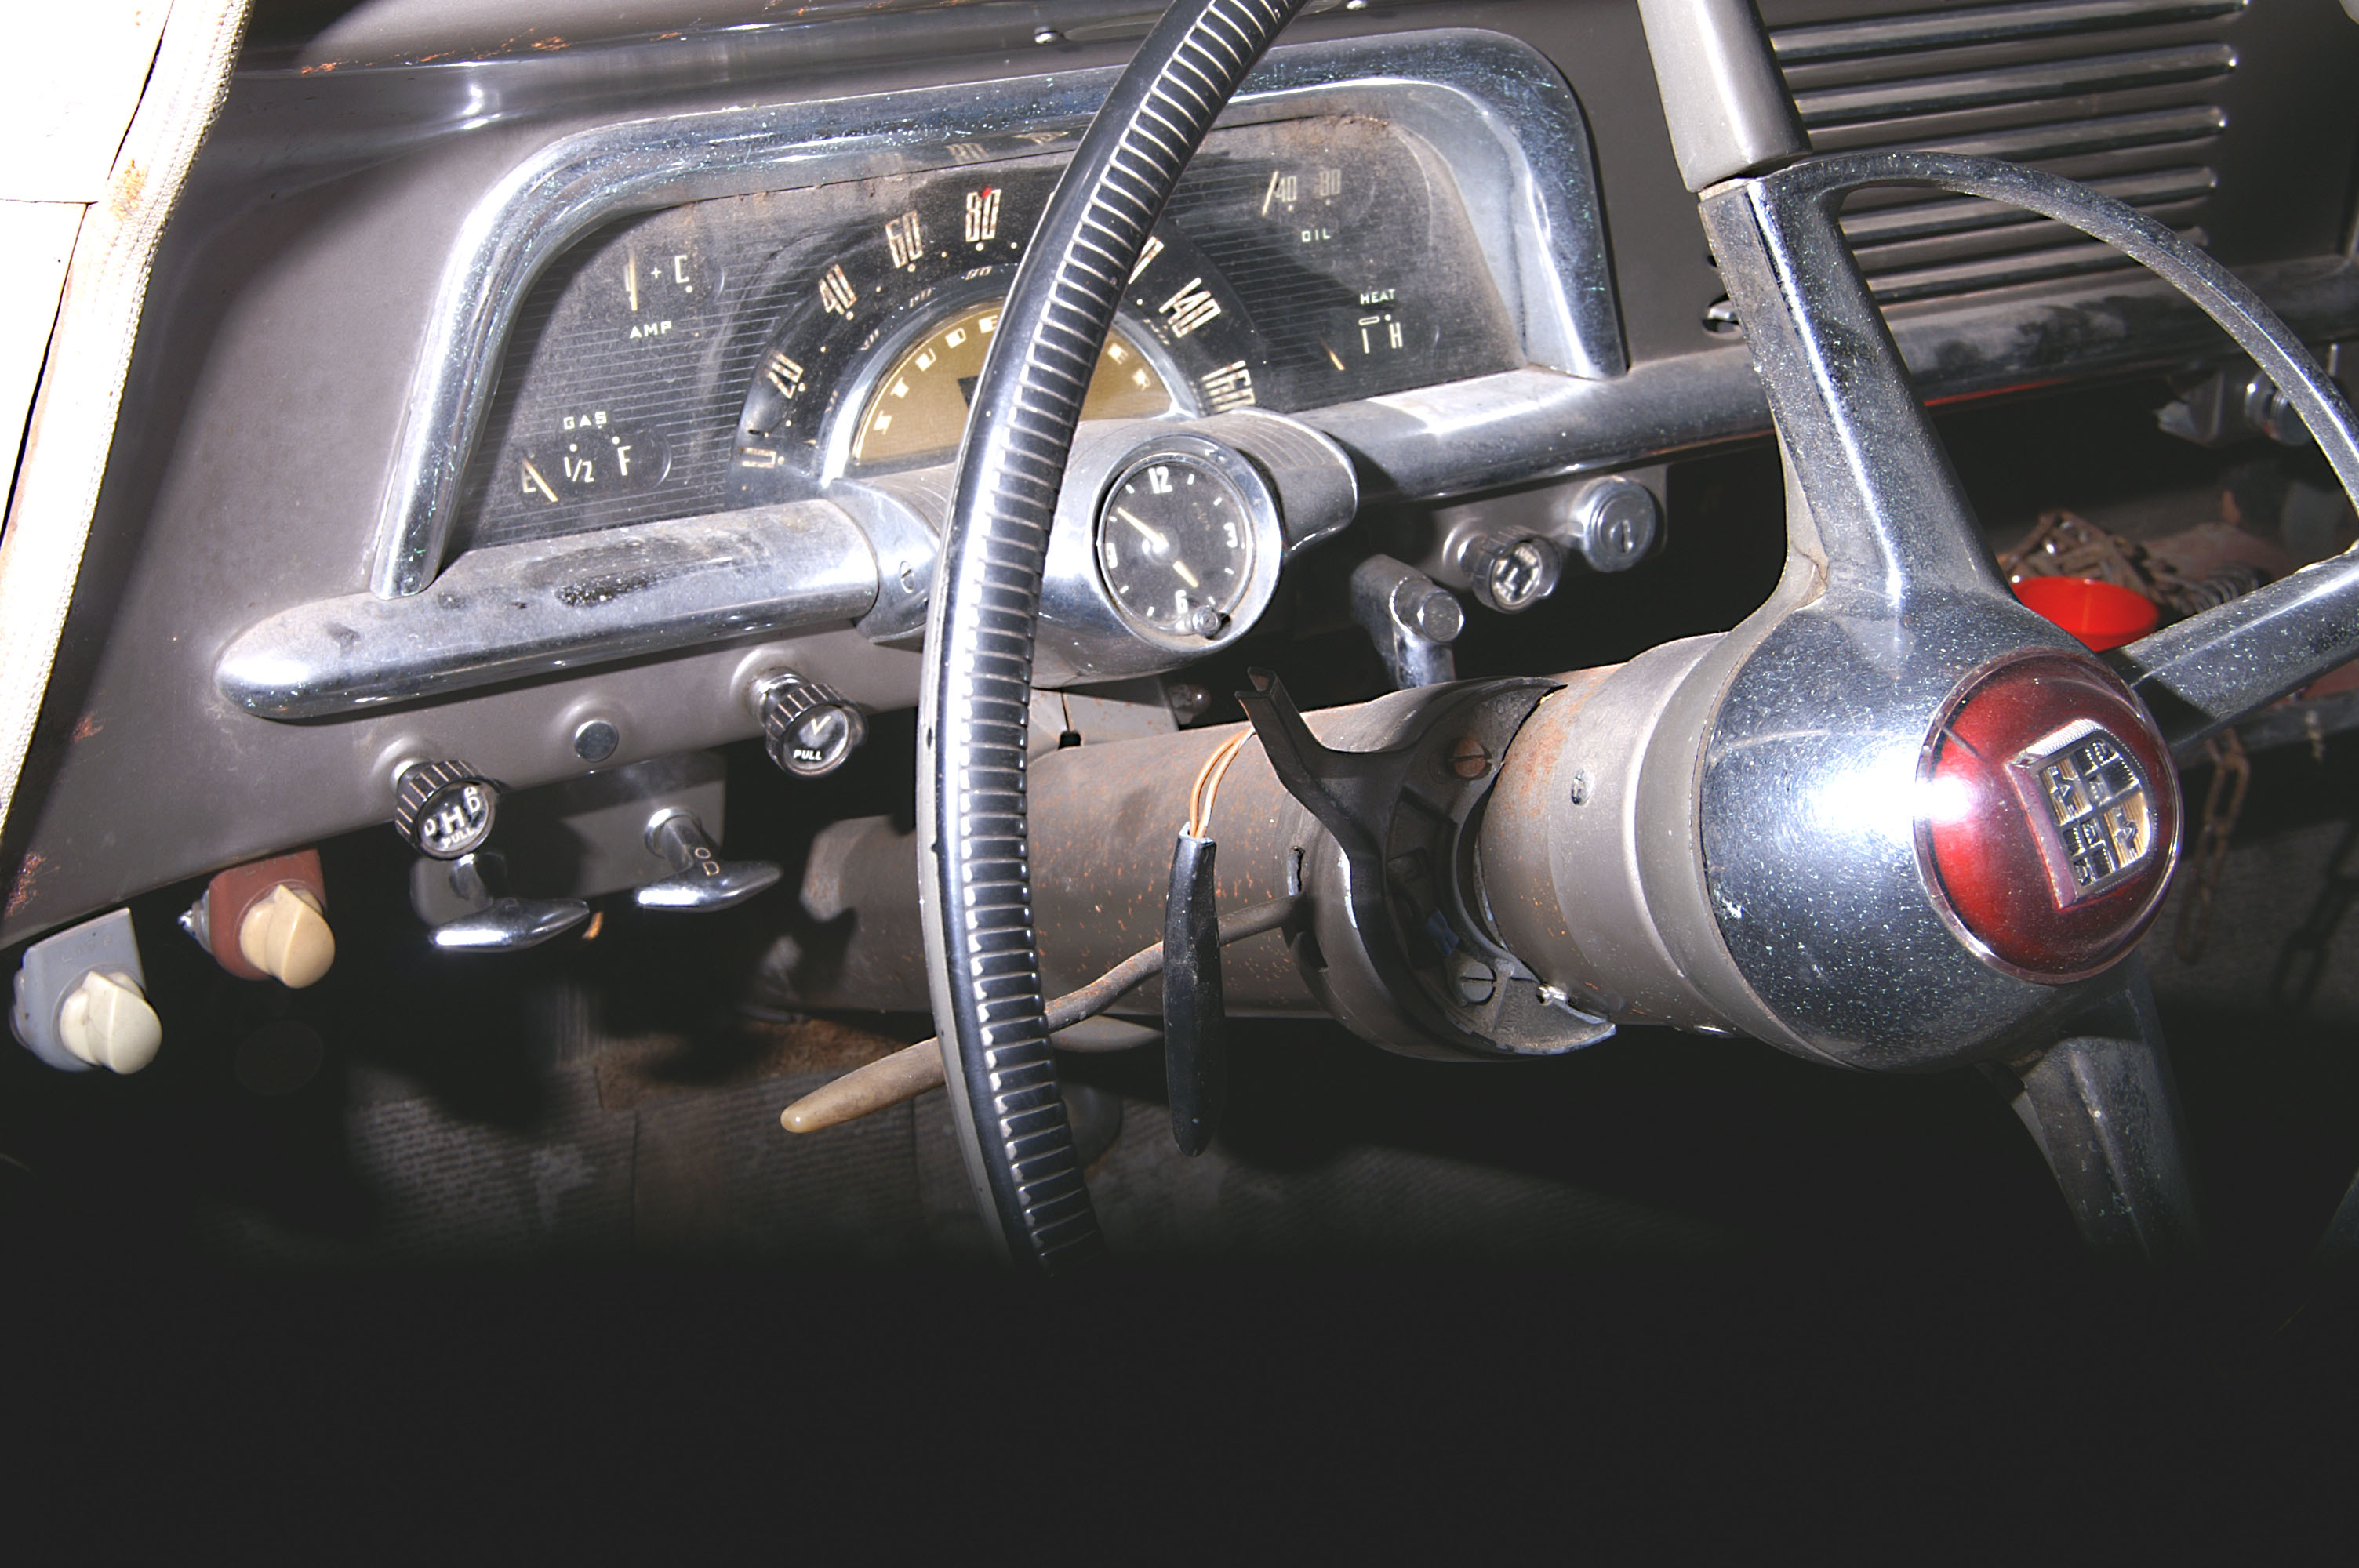
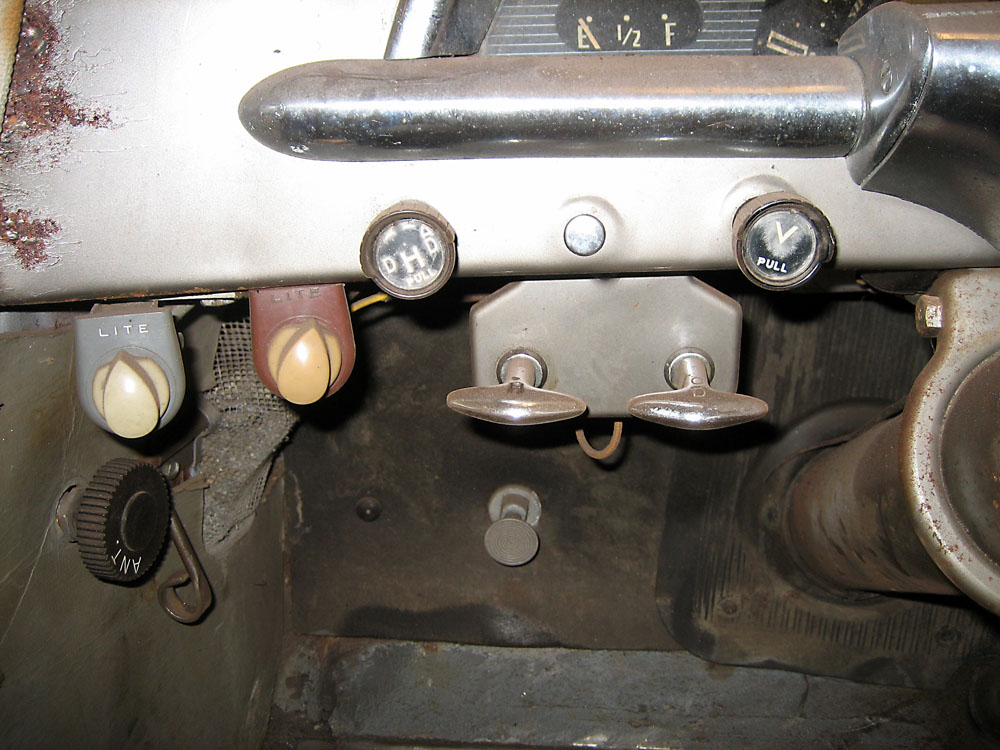
A photo of part of the dashboard. I was a little confused about the different switches and what they are for. Some of these switches are aftermarked so I have to follow the cables to see where they lead to.
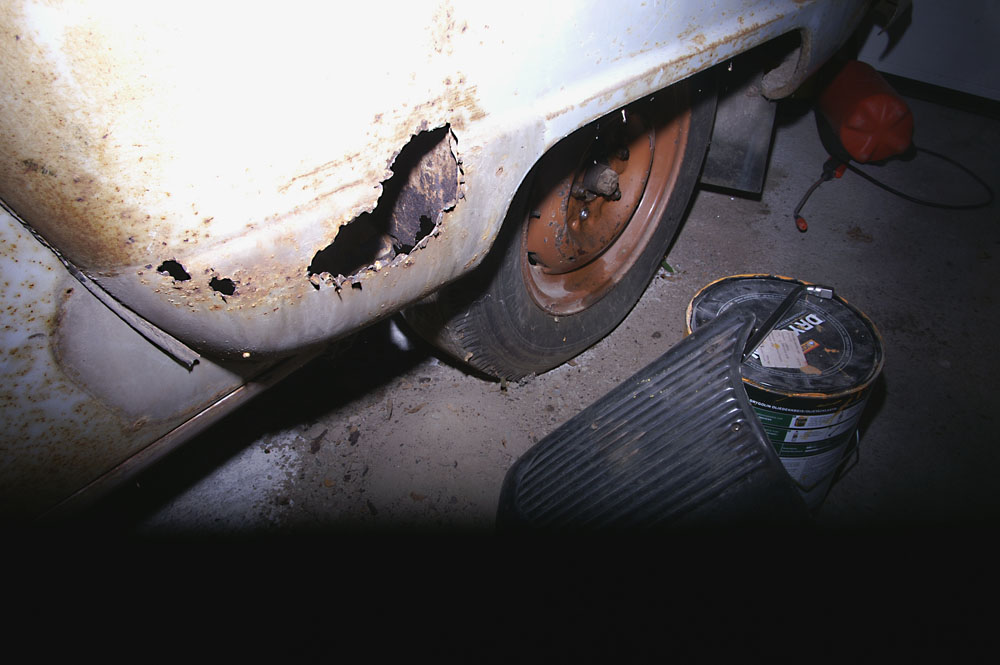
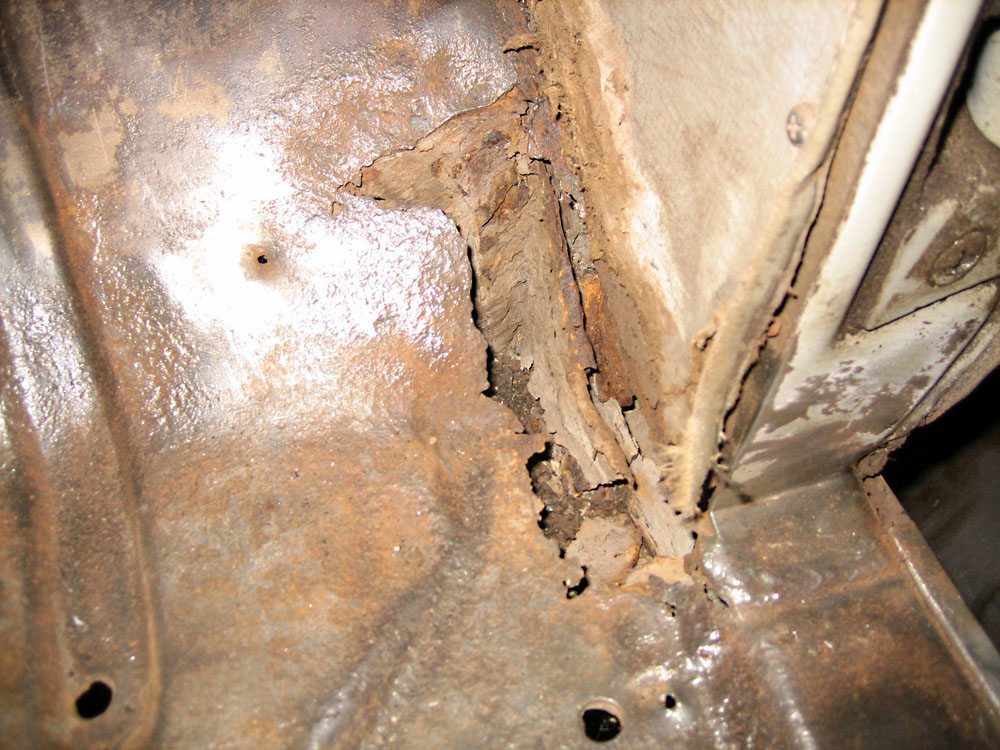
I was not so happy when I took of the fender gravel guard and saw this, the fender gravel guards are on the floor. This gives me more work and welding.
On both sides there is an arm rest compartment. They are big and deep, and you see them both before I took them out.
I'm sure you can keep a half pig in them, at least a case of beer. I took them out because I wanted to clear the floor completely.
So I started to use an angle grinder with a steel brush, and this did the job. You can see the bare metal is shining and my face was the opposite. I was not allowed to go into the living room to have a cup of coffee. Not in those clothes, she said.
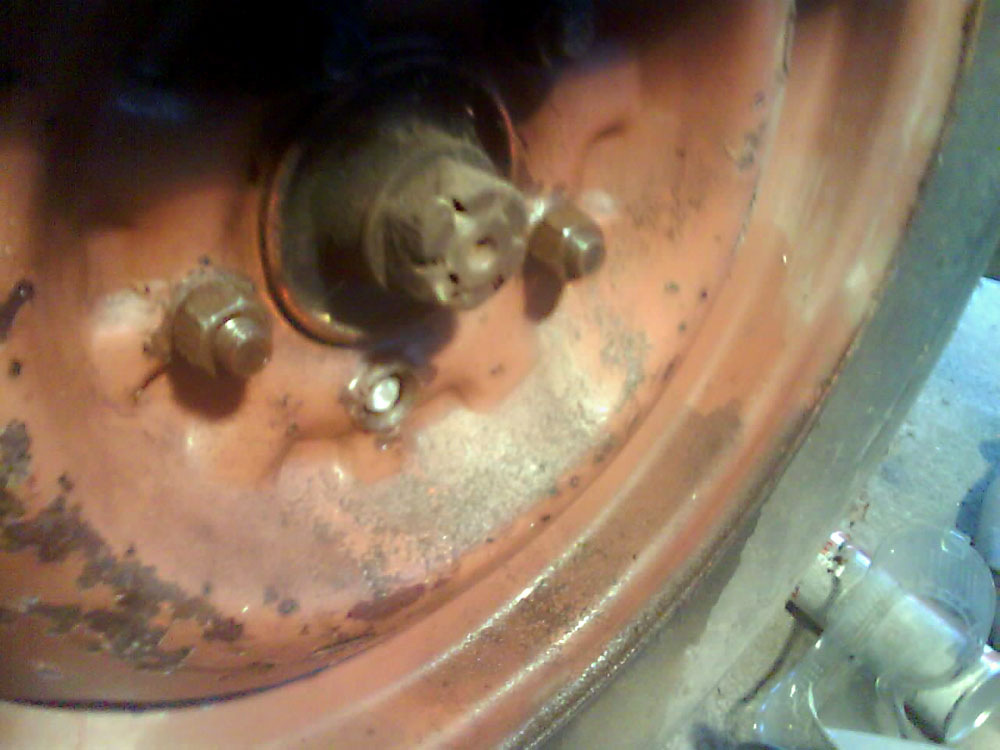
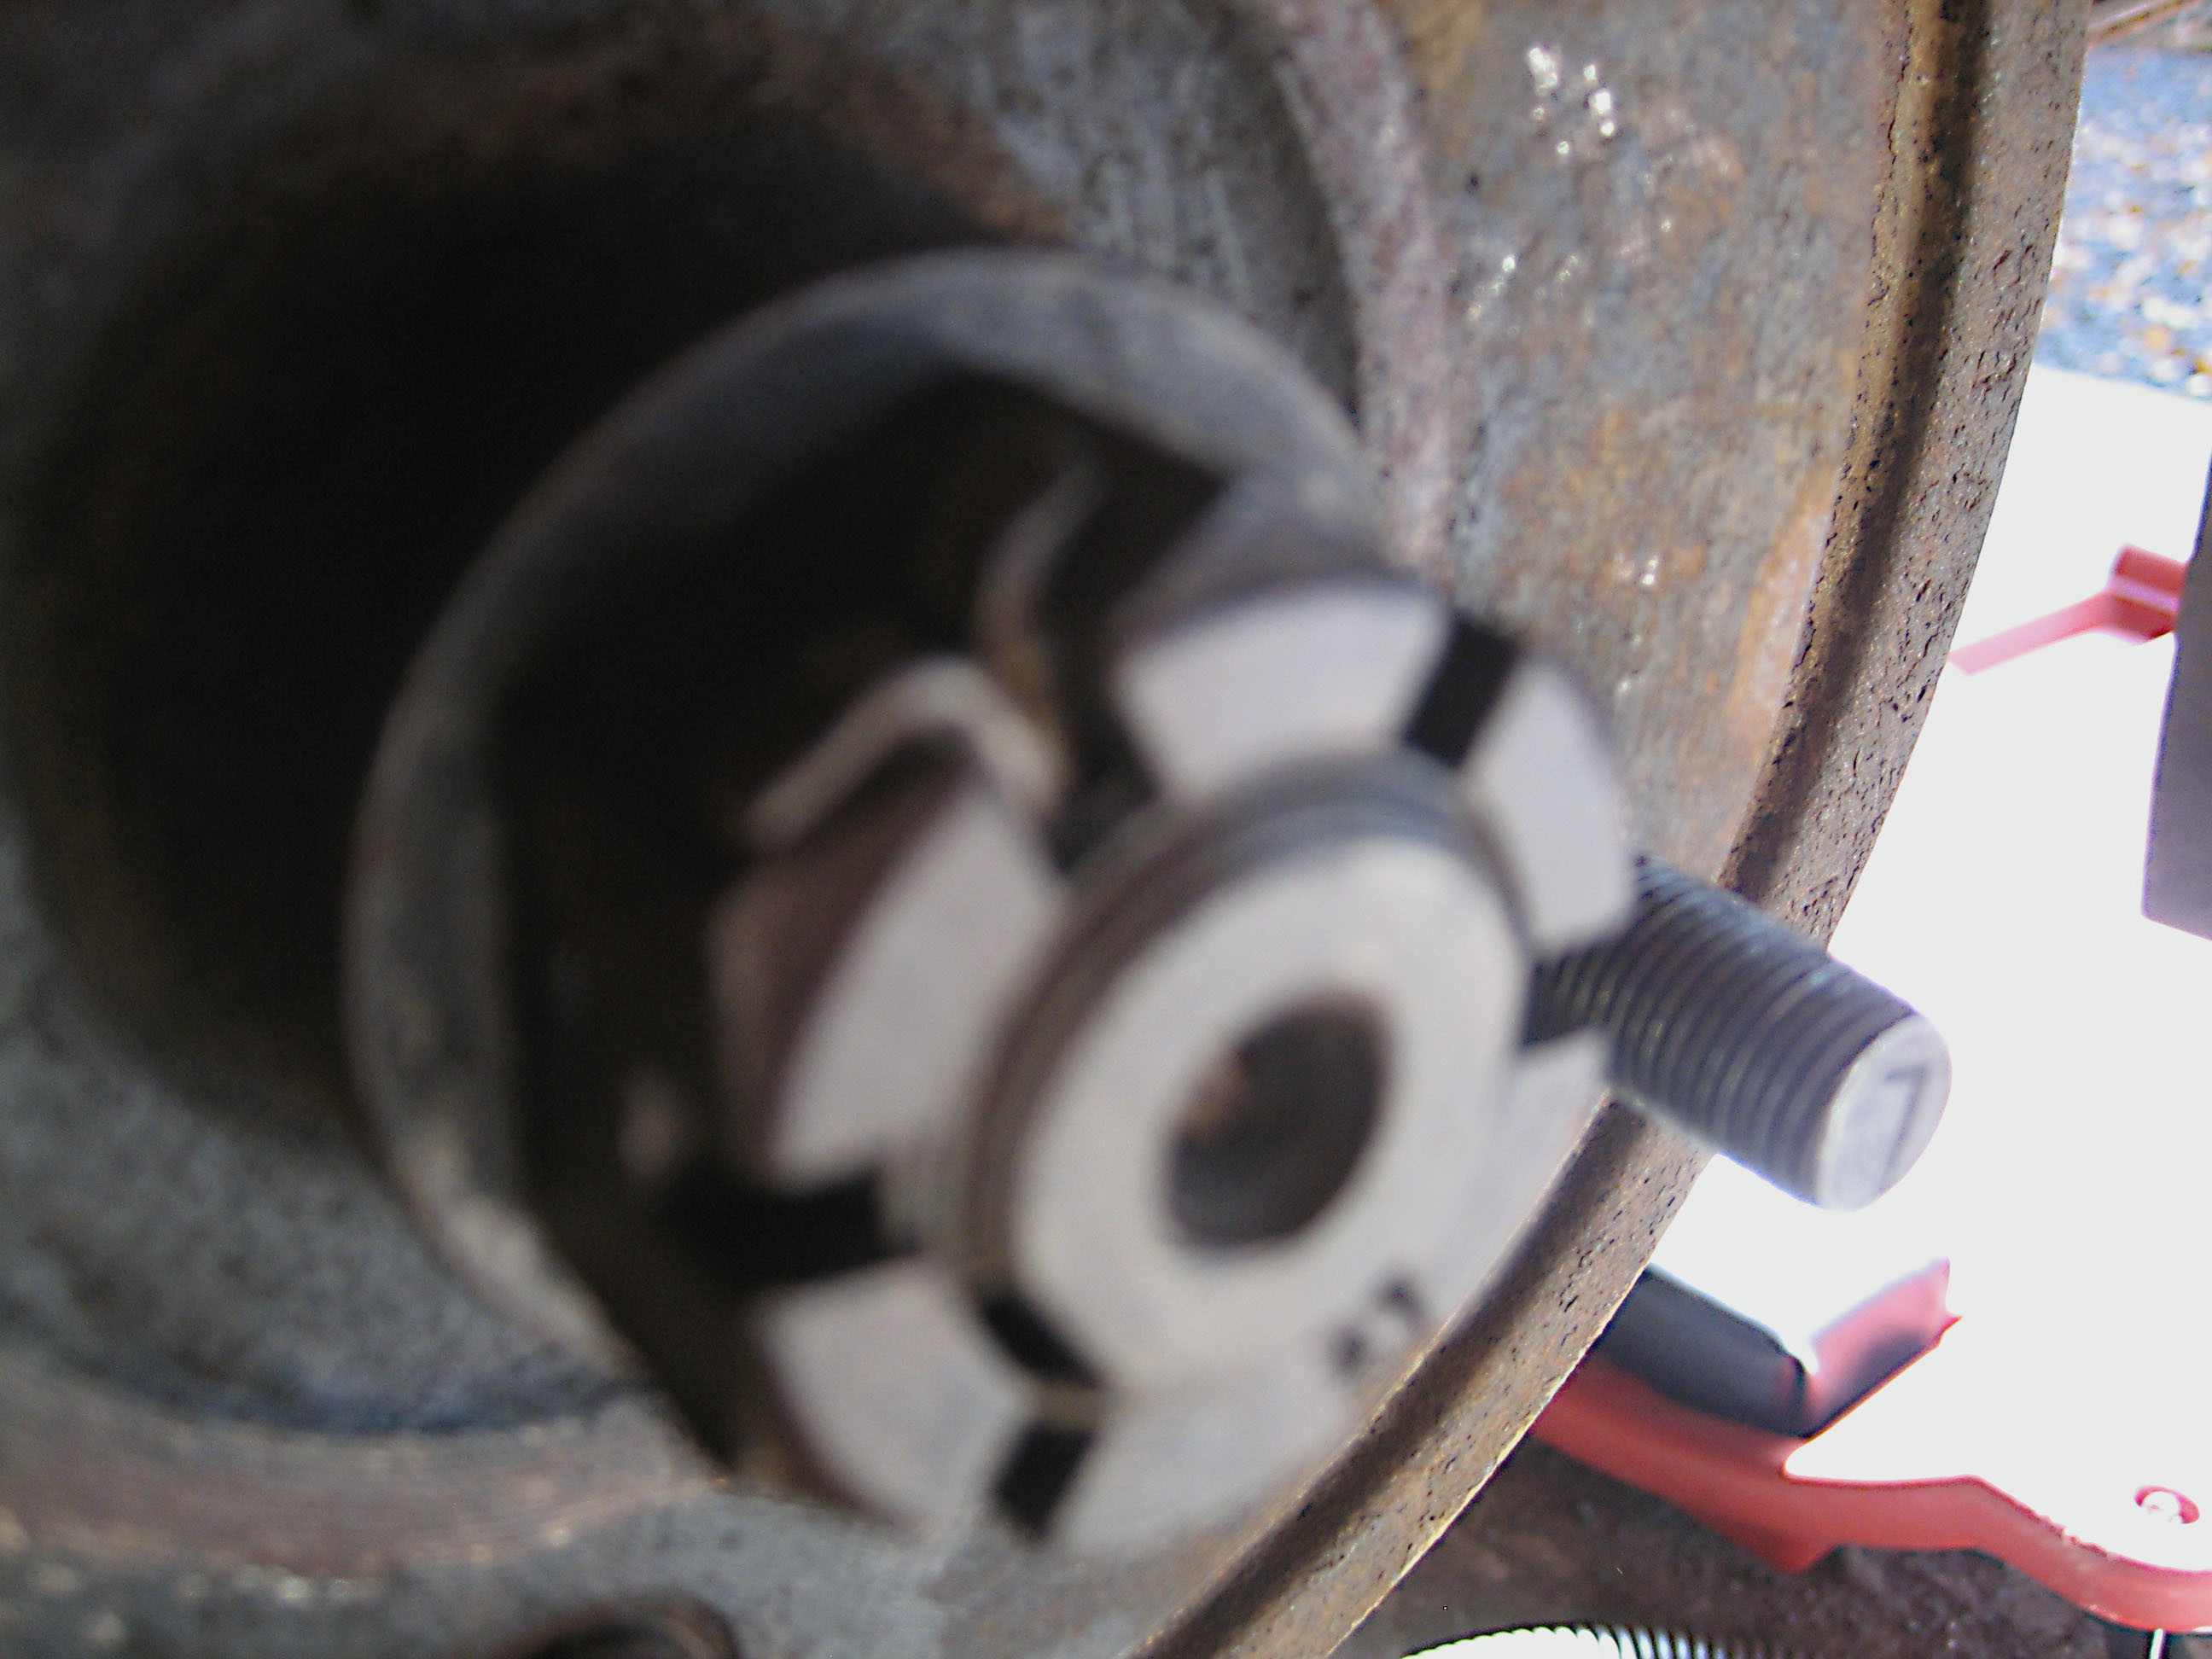
I thought taking off the wheels would be a piece of cake. Oh boy, I was wrong! I used a lot of penetrating oil, but still it was difficult, and you see the result here, one bolt is broken. Then a Studebaker friend told me, when I said it was difficult, he said that he thought the nuts on the left side are left-threaded...? Left thread? Okay, I went out and tried to pull the nuts left thread and guess what ... they came of nicely, even after 40 years.
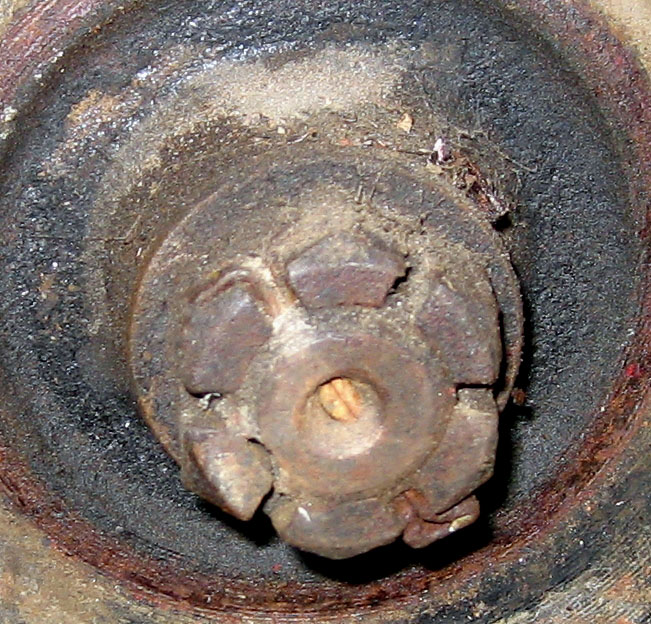
To get the drum off I had to remove this nut. Was it right or left threaded? I brushed off the sand and dust to try to see which way the threads were going. After cleaning I was still not able to see if it was left or right threaded. I decided after a talk with a Studebaker friend to try to pull it off the "normal" way. I took the wrench and gave it a little blow with the hammer and it came off nicely, after I removed the split-pin of course. Now I have to use a pulling tool to get the drum off.
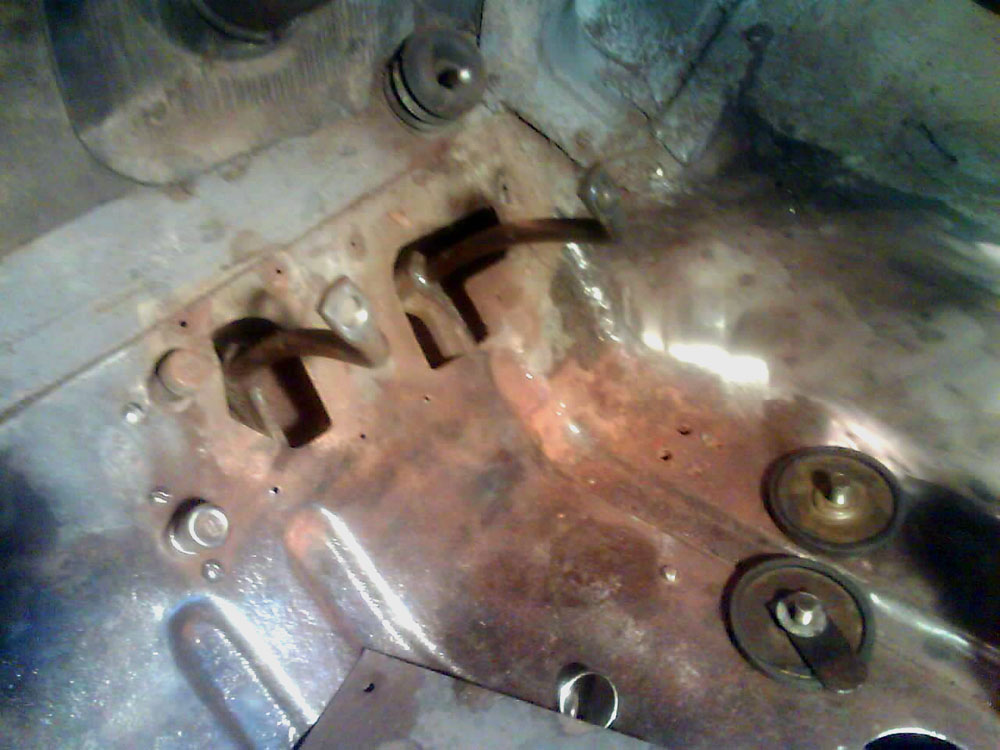
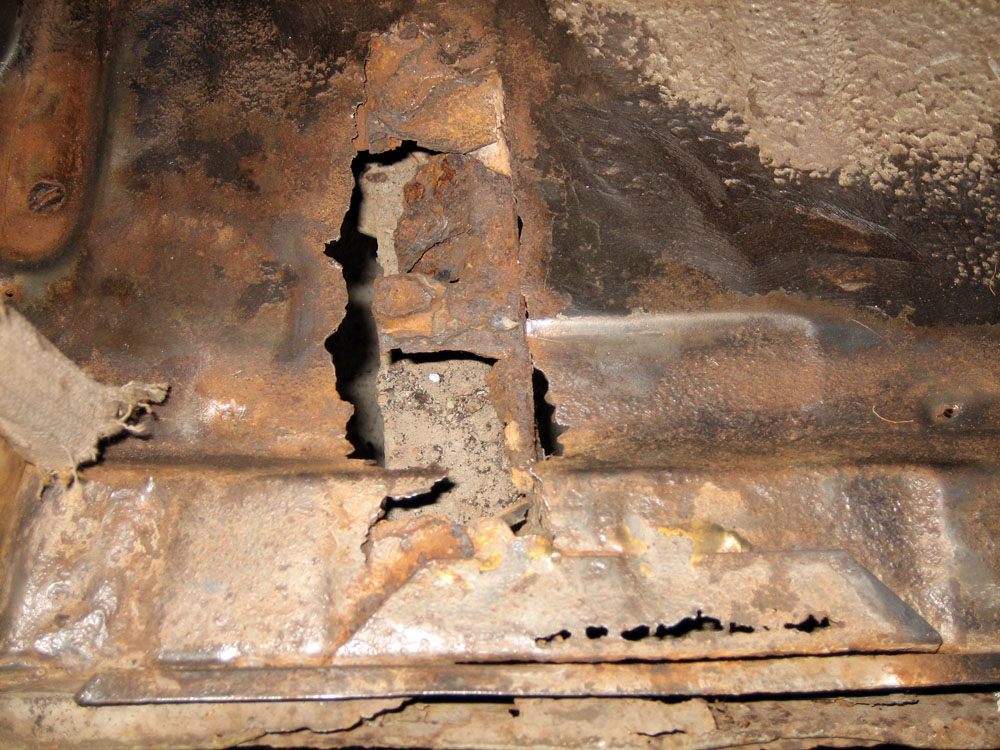
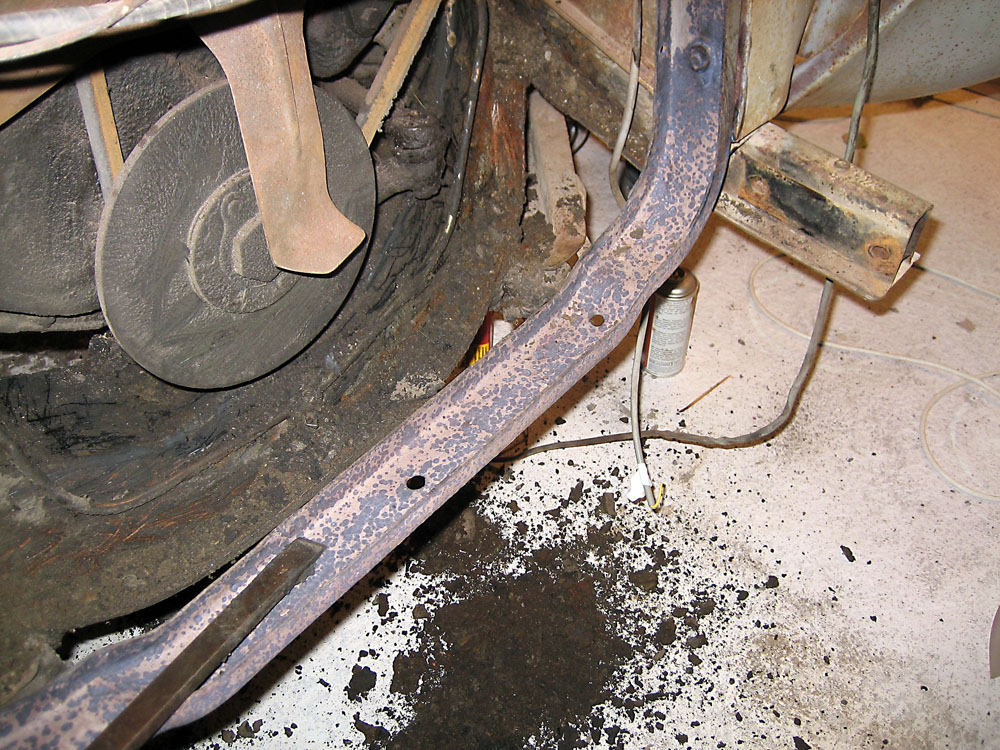
The floor above the crossrail under the front seat looks like this, so more welding. There was also a hole in the front on the right side too.
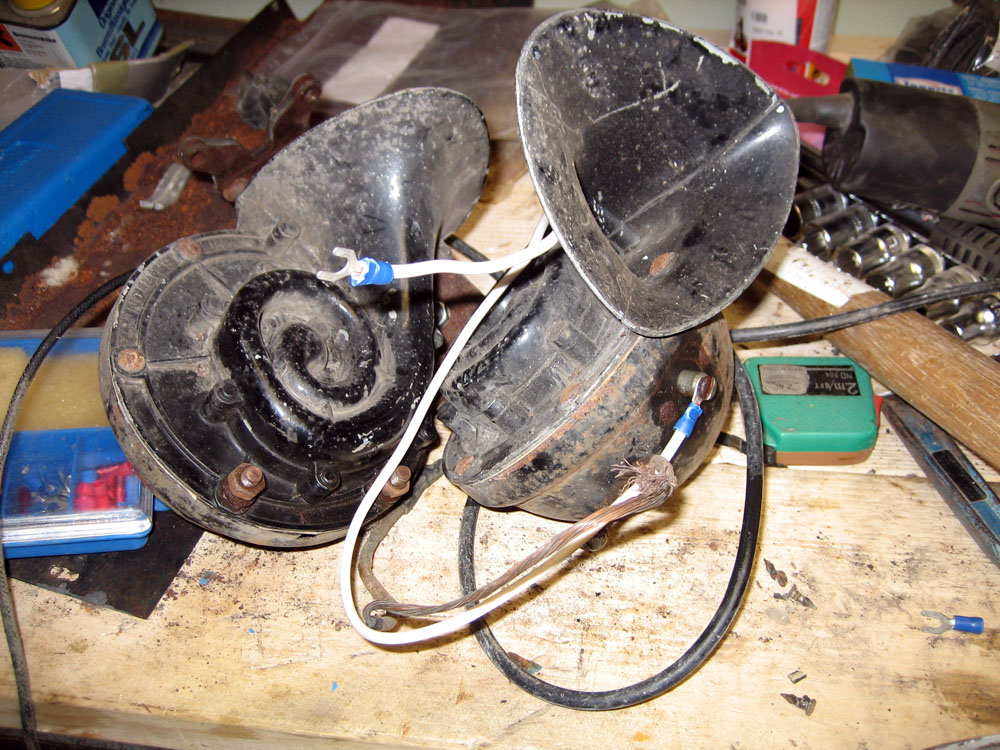
I was testing my horns that I got from Ernie (Loga Enterprises), and they were working. But they need to be cleaned and painted. Two sounds: one was rather high in tone and the other was deeper. Sounds nice. . I have to change the cables on the horns. I changed one of the cables before I was testing them, because the insulation was off. I just had to remember that on this car that "+" is the ground. Not like I'm used to, with "-" to ground.
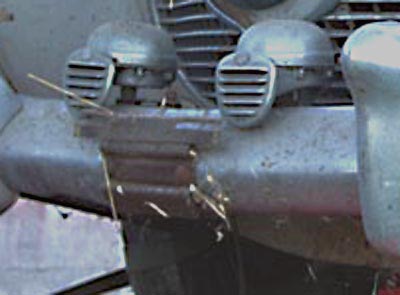
I was also testing the horn that was on the car (see the photo), these horns are probably aftermarket, but the sound of the horns was very nice.
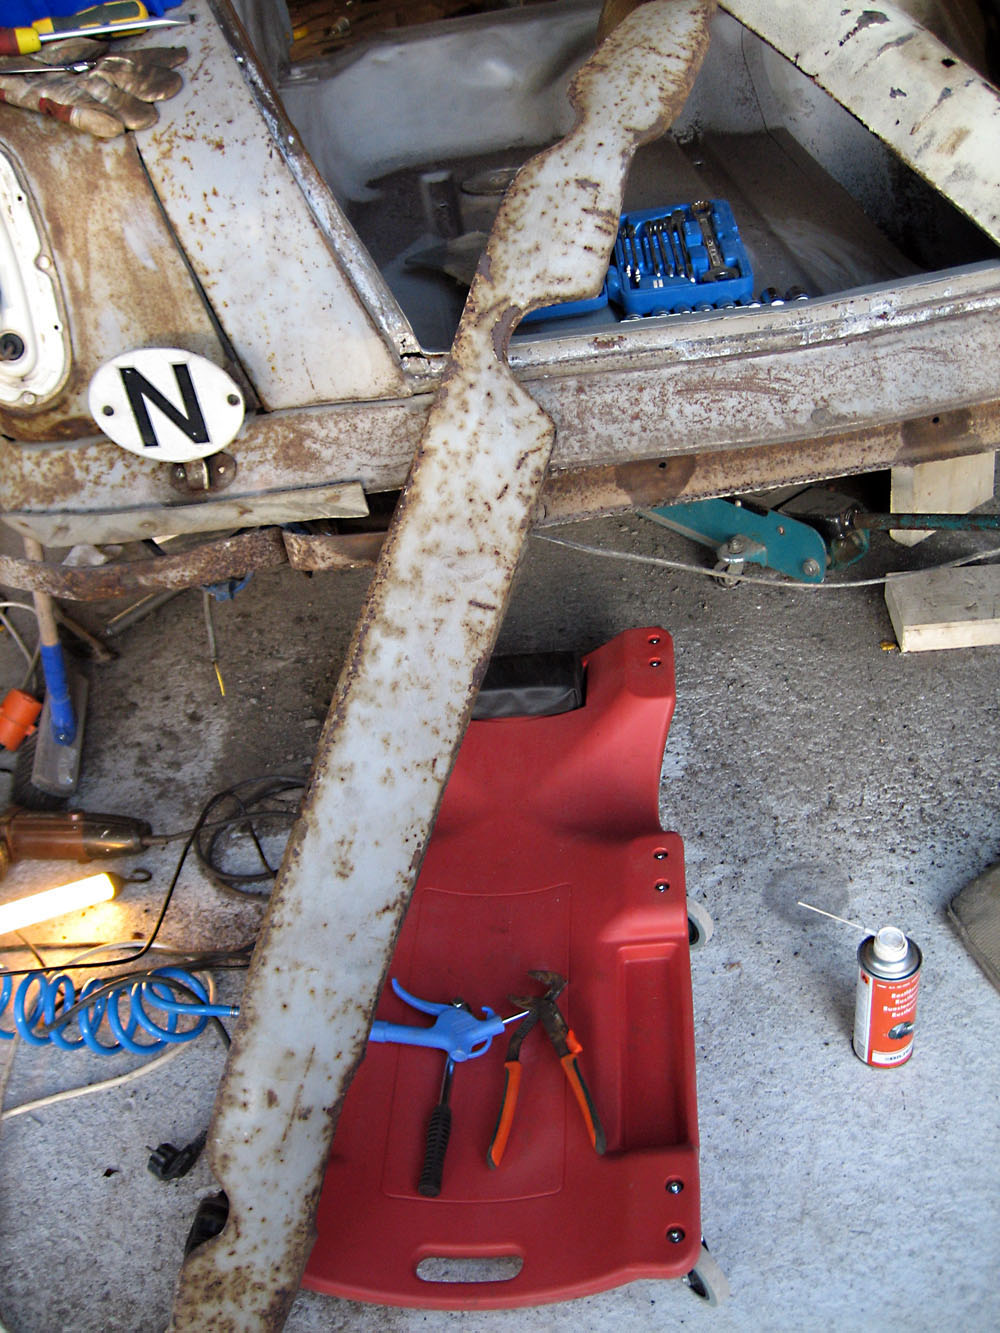
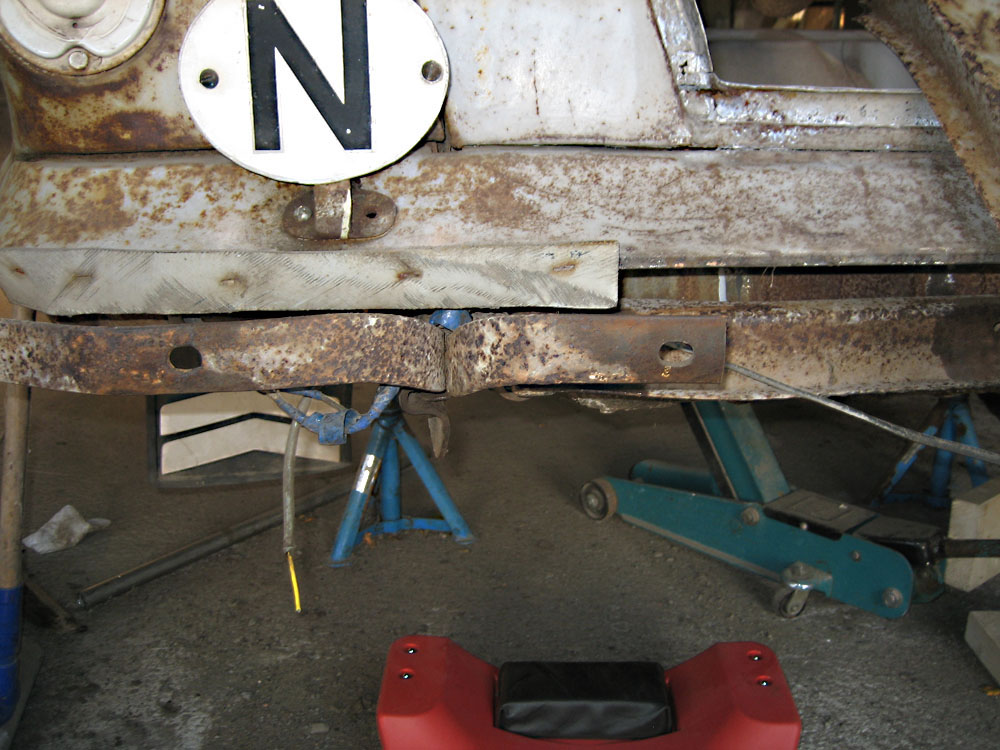
It took me some hours to get the rear bumper off and the deflector for the rear bumper too, but they are off at last.
I think I'm going to take off the shock absorbers and the rear bumper too, so I can brush and paint them.
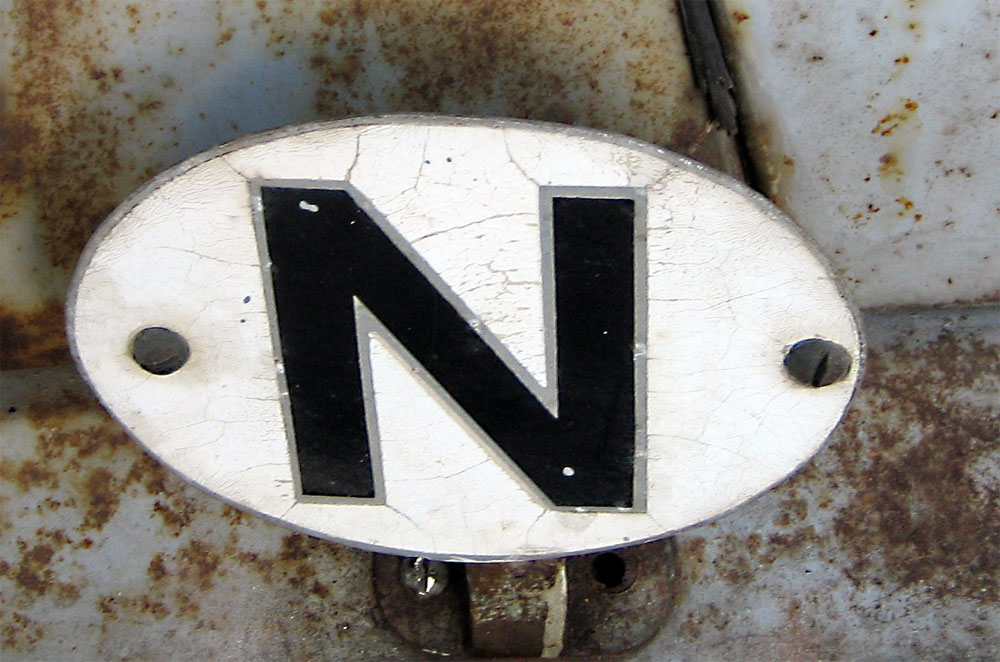
I don't think I will need the nationality mark, because I don't think I will travel much abroad. But you never know, so I think I'll keep it.
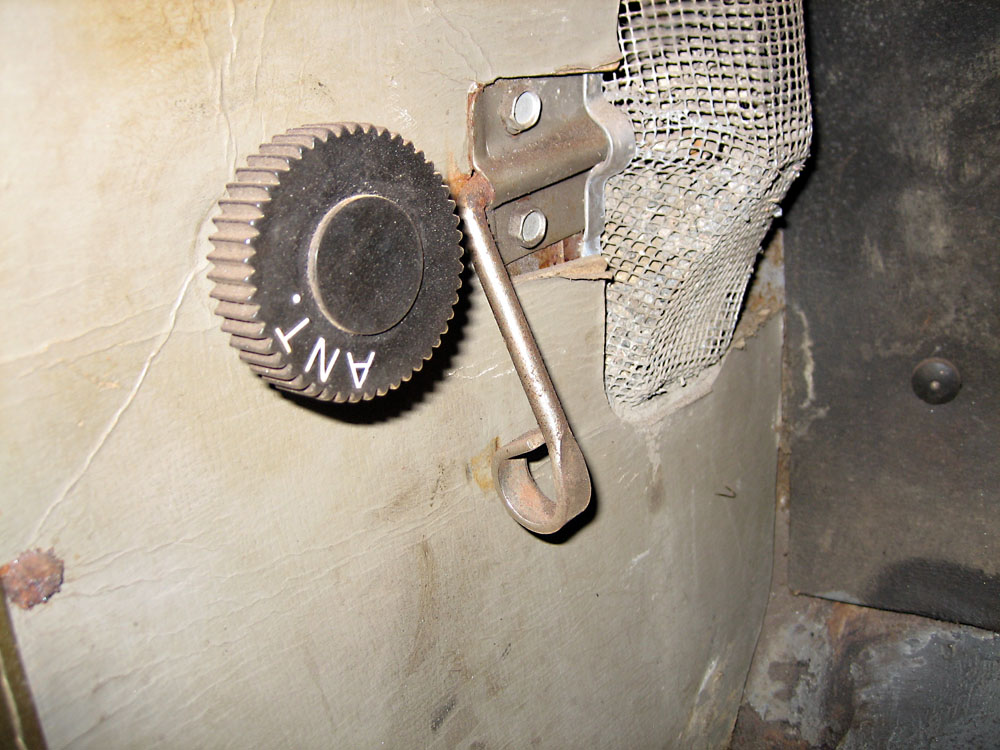
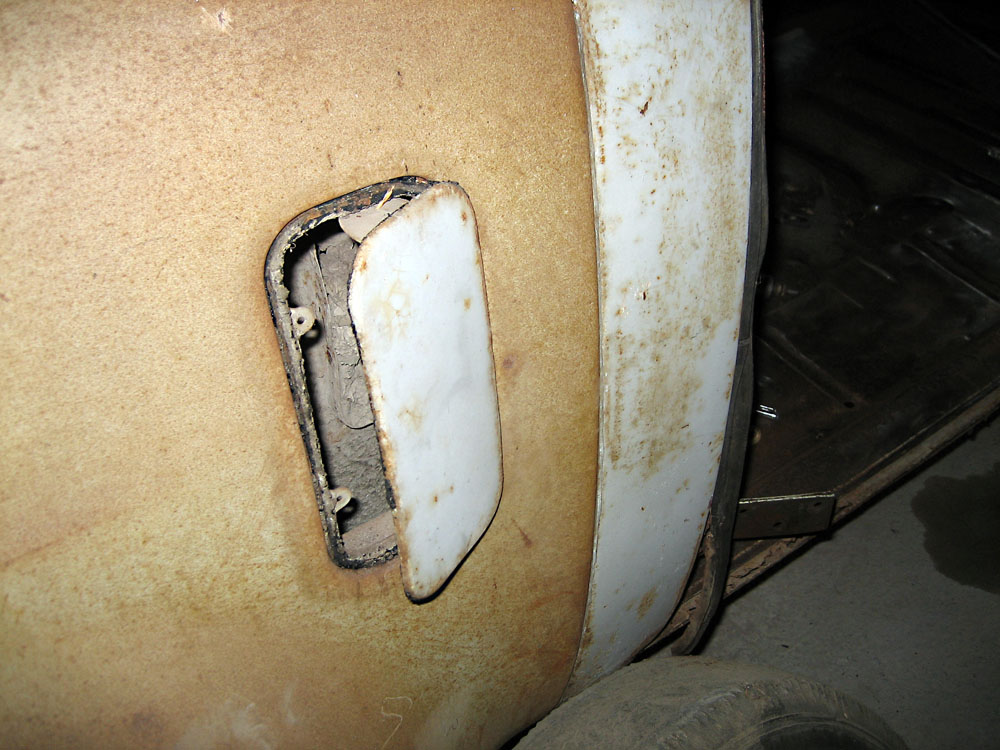
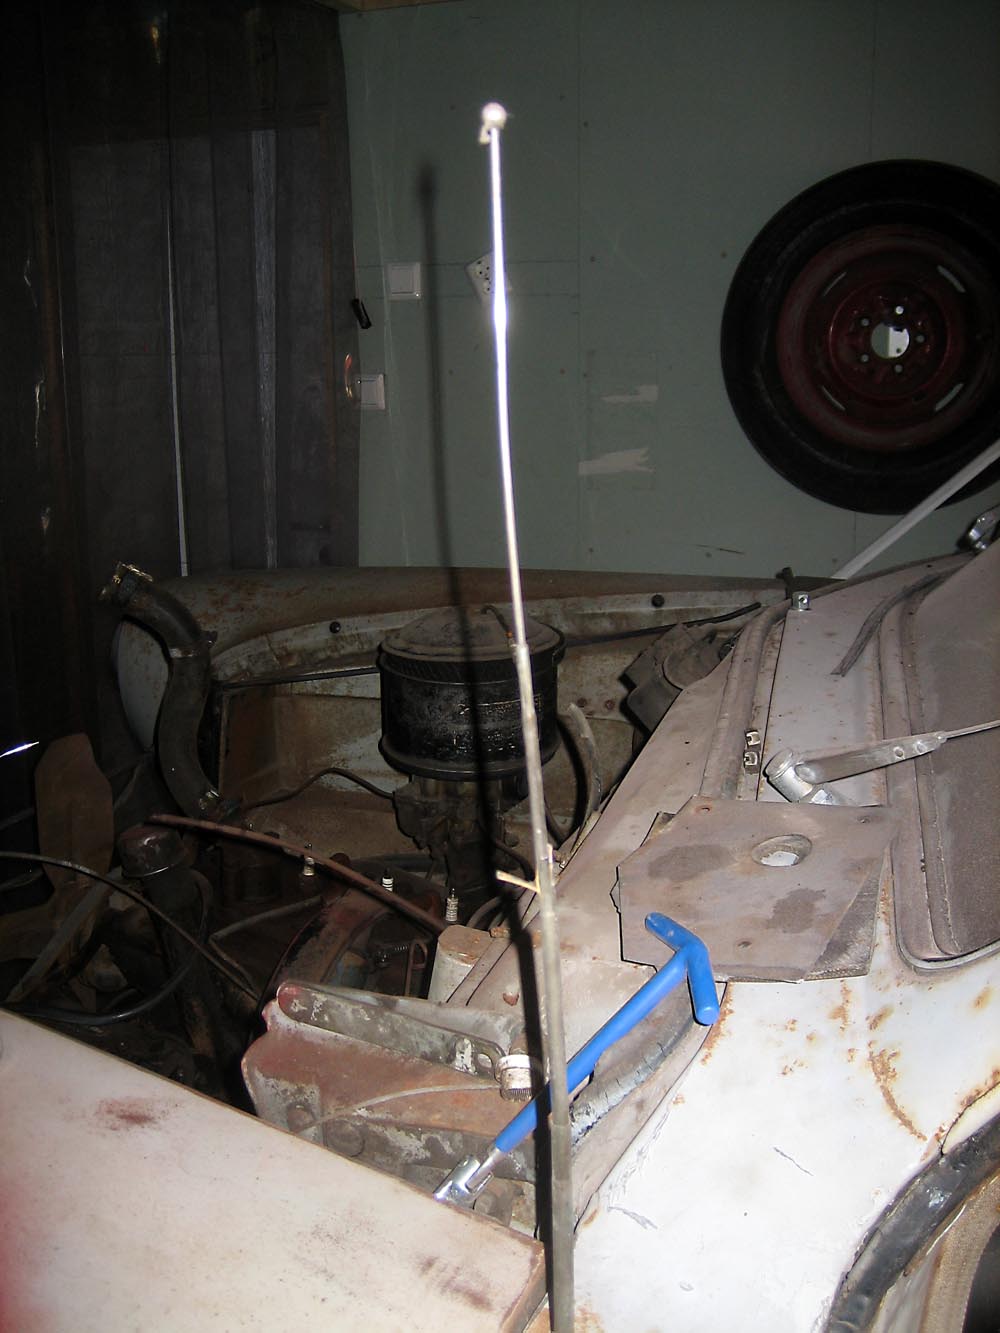
I was a little puzzled what this was and how I could open the butterfly valve on the left side. I tried to move the arm to the right and then to the left, but I could not move it. Then I tried to pull it and sim sala bim, it opened. So what was the round button to the left of the butterfly valve? I tried to pull it, nothing happened. Then I tried to turn it, and looking out the window I saw the antenna was going up and down. Not bad, but I have to get a new antenna, because this one does not look good.
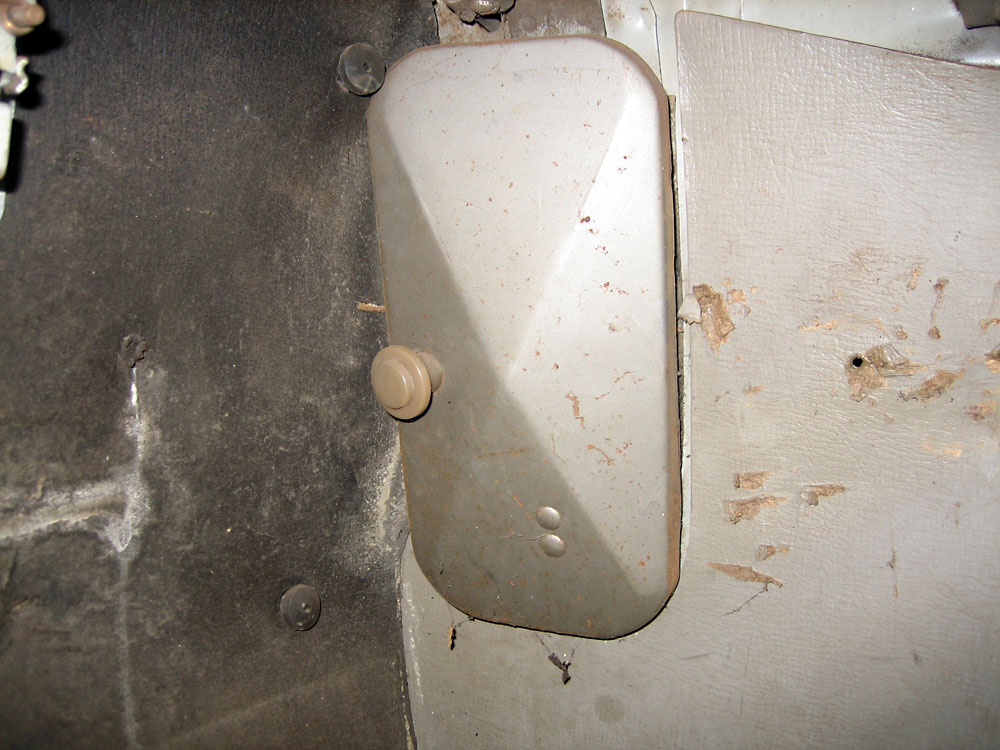
There is a butterfly valve on the right side too, but so far I have not found out how I can open the outer valve. The inside valve that you see on this photo, you can just pull the nob, but outside valve?
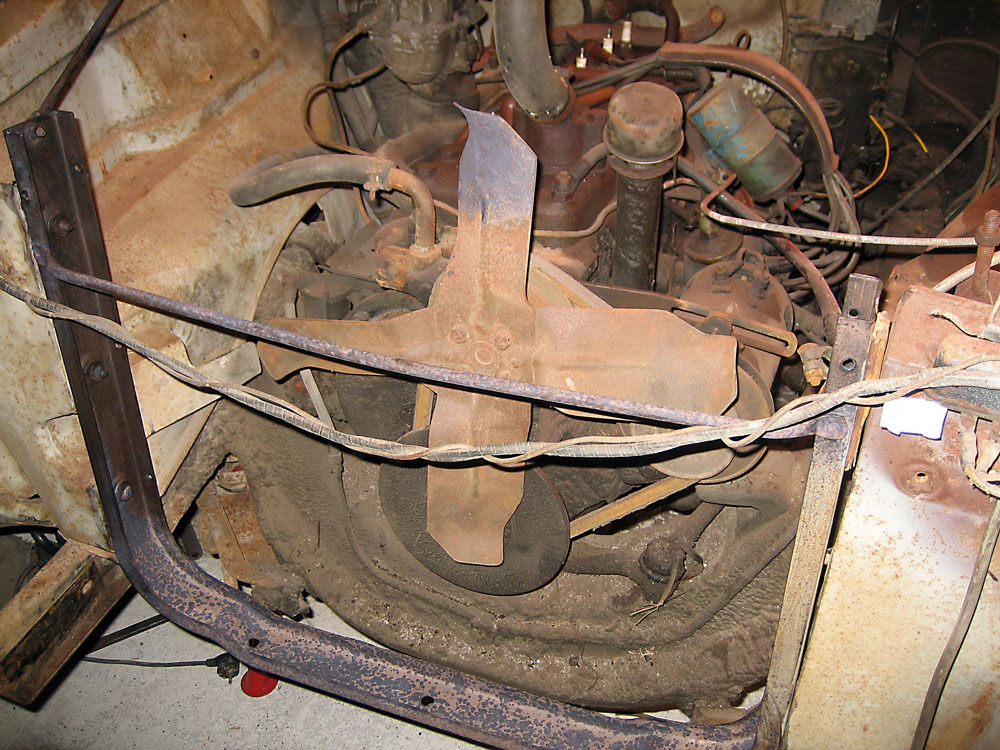
Here I've got the front off and also taken out the radiator so it will be easier to get to the engine. And you can see that there is plenty of dirt here.
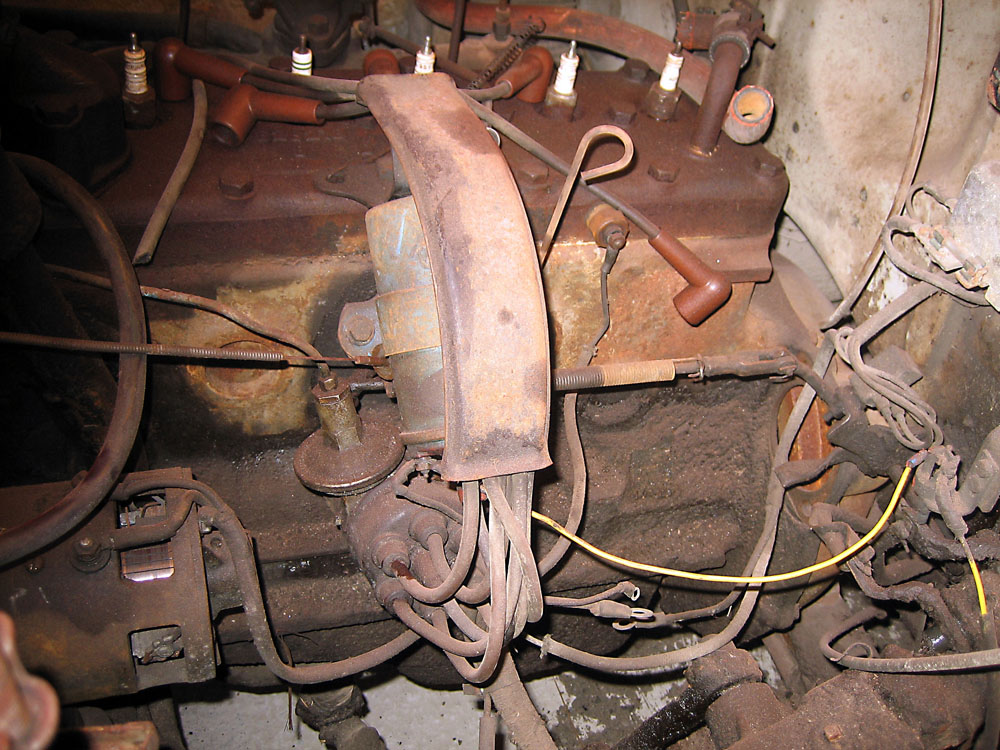
The engine block needs to be cleaned too.
Here I've started to remove some of the dirt and it's piling up on the floor.
There is some dirt here too, but I'll clear that when I get the engine out.
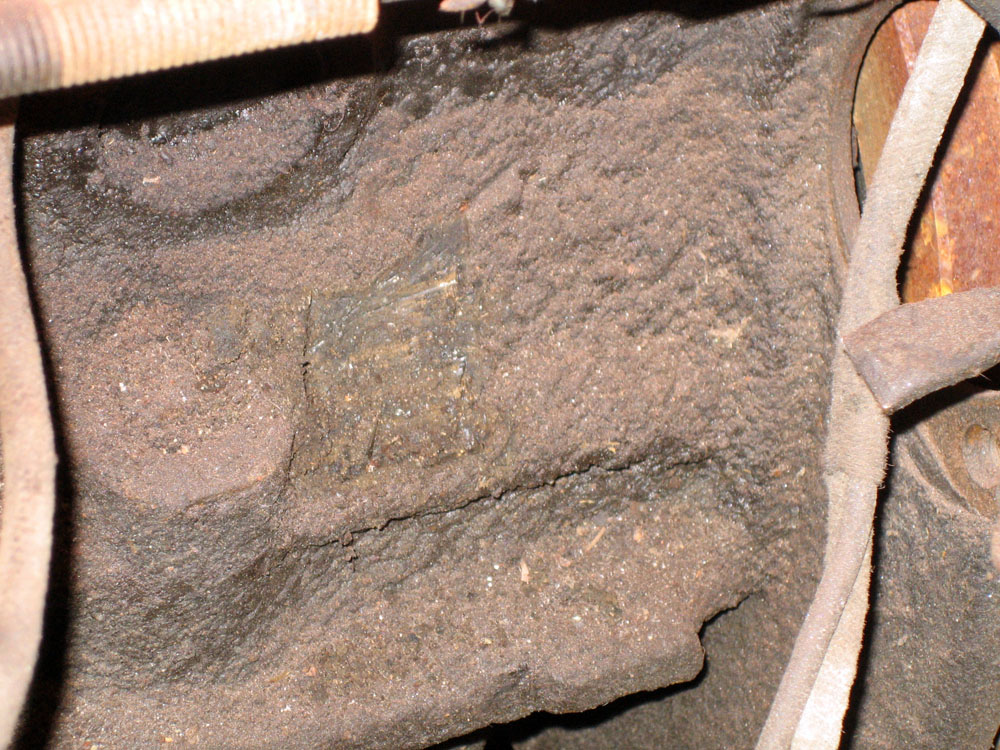
You get rather dirty in the face when you are under the car trying to get some rusty bolt out. Not very nice? There is no doubt that the engine needs to be cleaned, but the carrot is that it might be nice in the end when I'm finished.
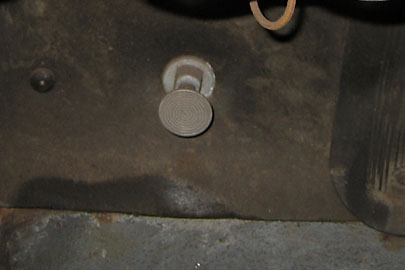
This thing puzzled me a little, what could this be? It's sitting under the left front wing, and does not say a thing. But after studying it for awhile I came to the conclusion that this must be a membrane pump since there was a small nipple on it, possibly for a 4 mm tube.
By looking under the dashboard I could see there was a foot pedal on the floor. This seems to have a connection to the membrane pump outside under the left front wing. So I found out that this must be for the windshield washer. So where was the water tank? Unfortunately it was not there, but again it's possible to get it from Ernie in Loga Enterprises. I could make something fancy with an electric pump, but I would like to have it back to the original.
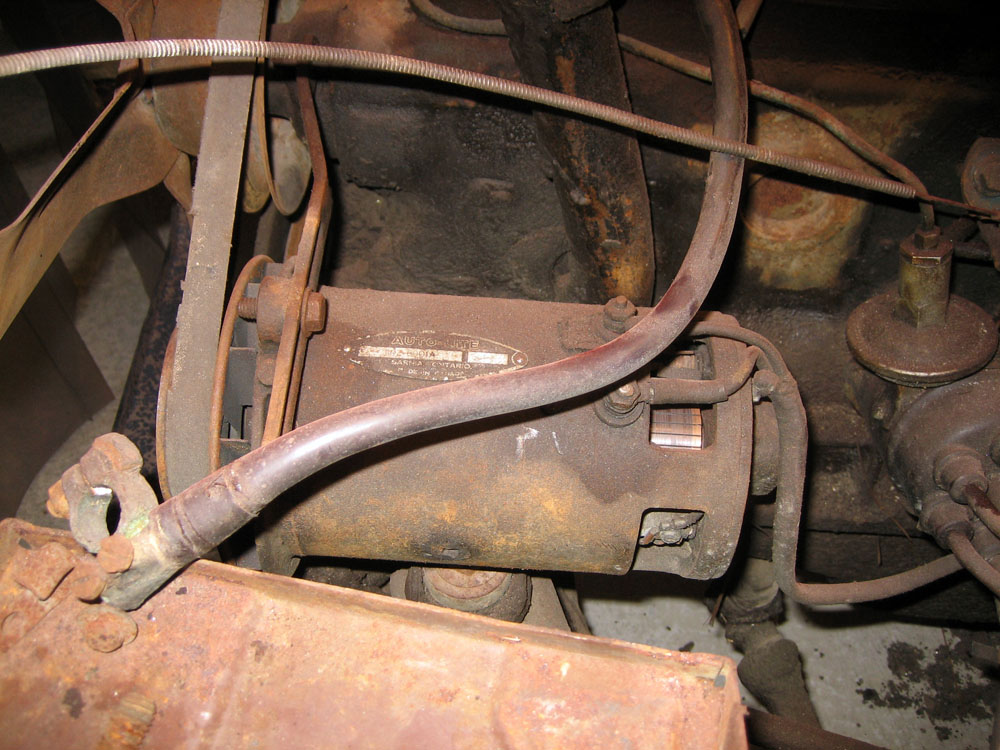
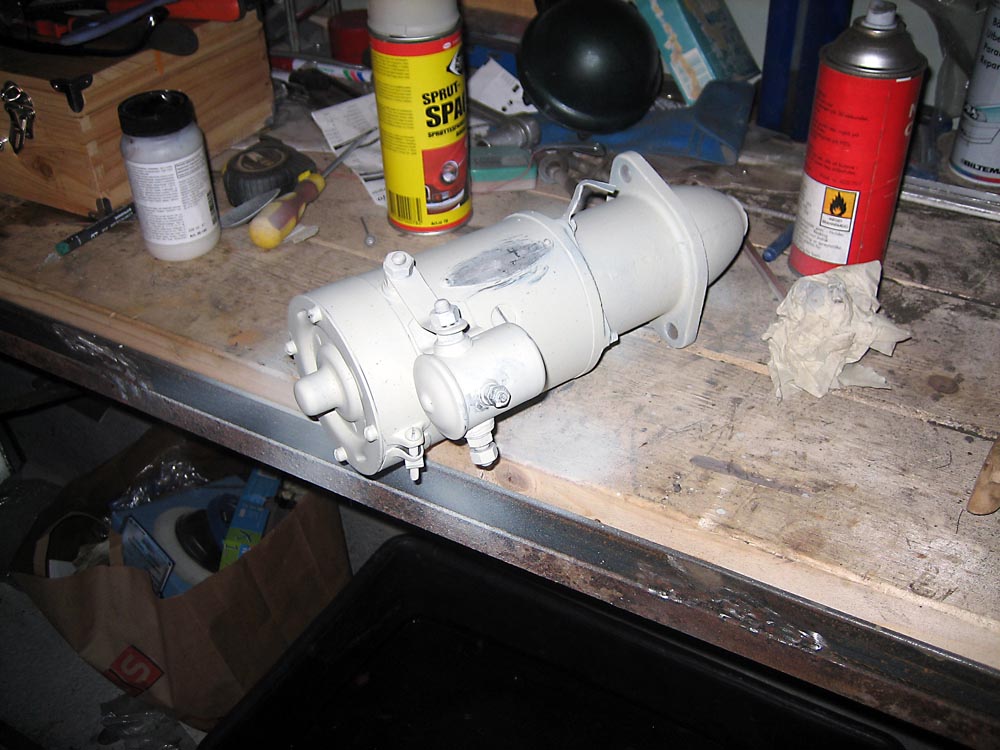
There are so many small things that need to be done. Here is the starter, which I've cleaned and primed ready for painting, so it will be looking nice.
Like this, the antenna does not look nice, I might change it and keep the elevator for lifting and lower the antenna. I must see when I dismount it.
Here is the light for the licence plate and opener assembly for the trunk dismounted.
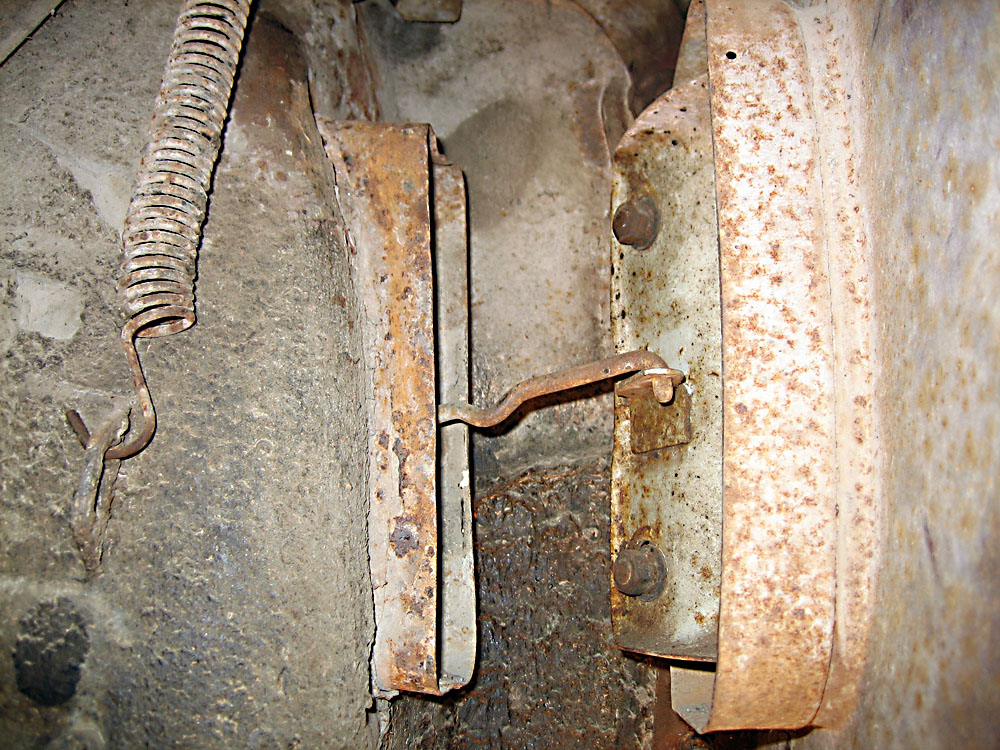
Here you can see the butterfly valve on the left side. The second photo is taken under the left front wing and you can see that the canal is missing.
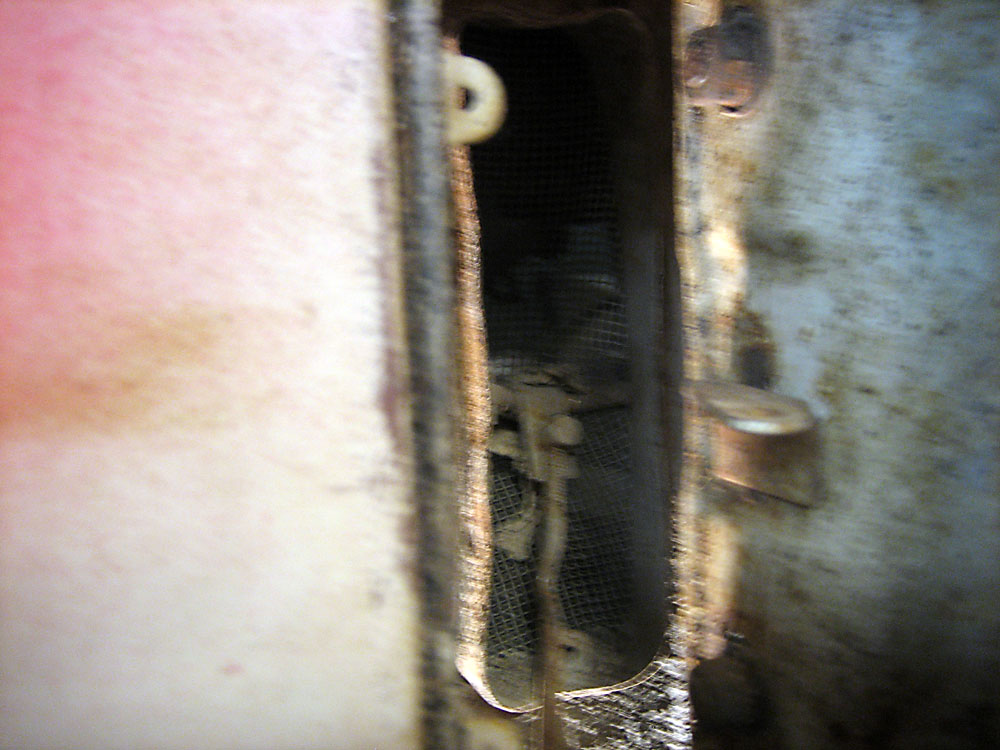
Here I've removed the valve so you can look in.
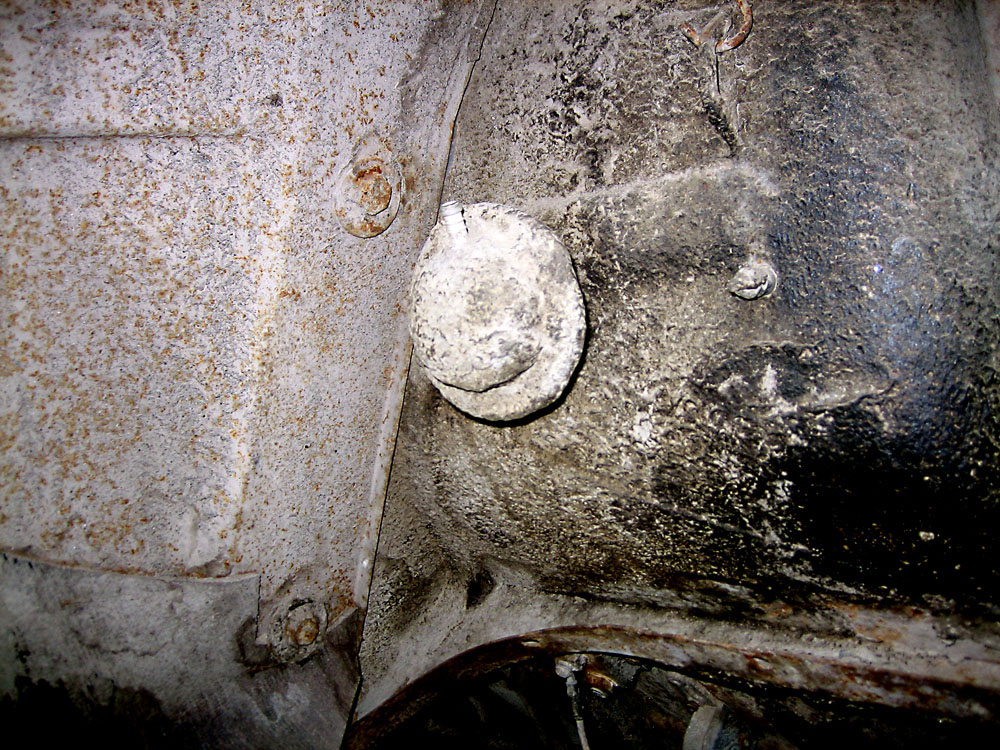
I'm about to dismount the frame for the radiator, and the bolt was not easy to reach. When I thought I had taken all the bolts, and thought I could lift out the frame, I could not get it out. So a closer look and there were two more bolts keeping the frame to the car. With this frame out, it should be easier to get the engine out.
Here you can see the bolt that holds the frame. There is a flat steel bar connected to the frame, and this bolt is not small. It goes through the chassis, and it will take some time to get the nut off because it's rusty.
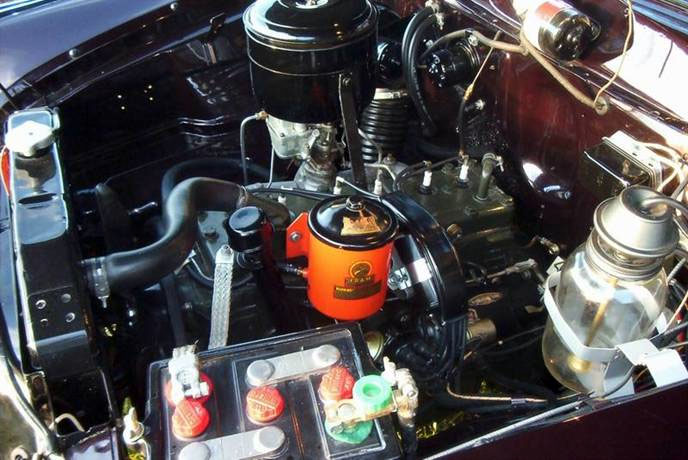
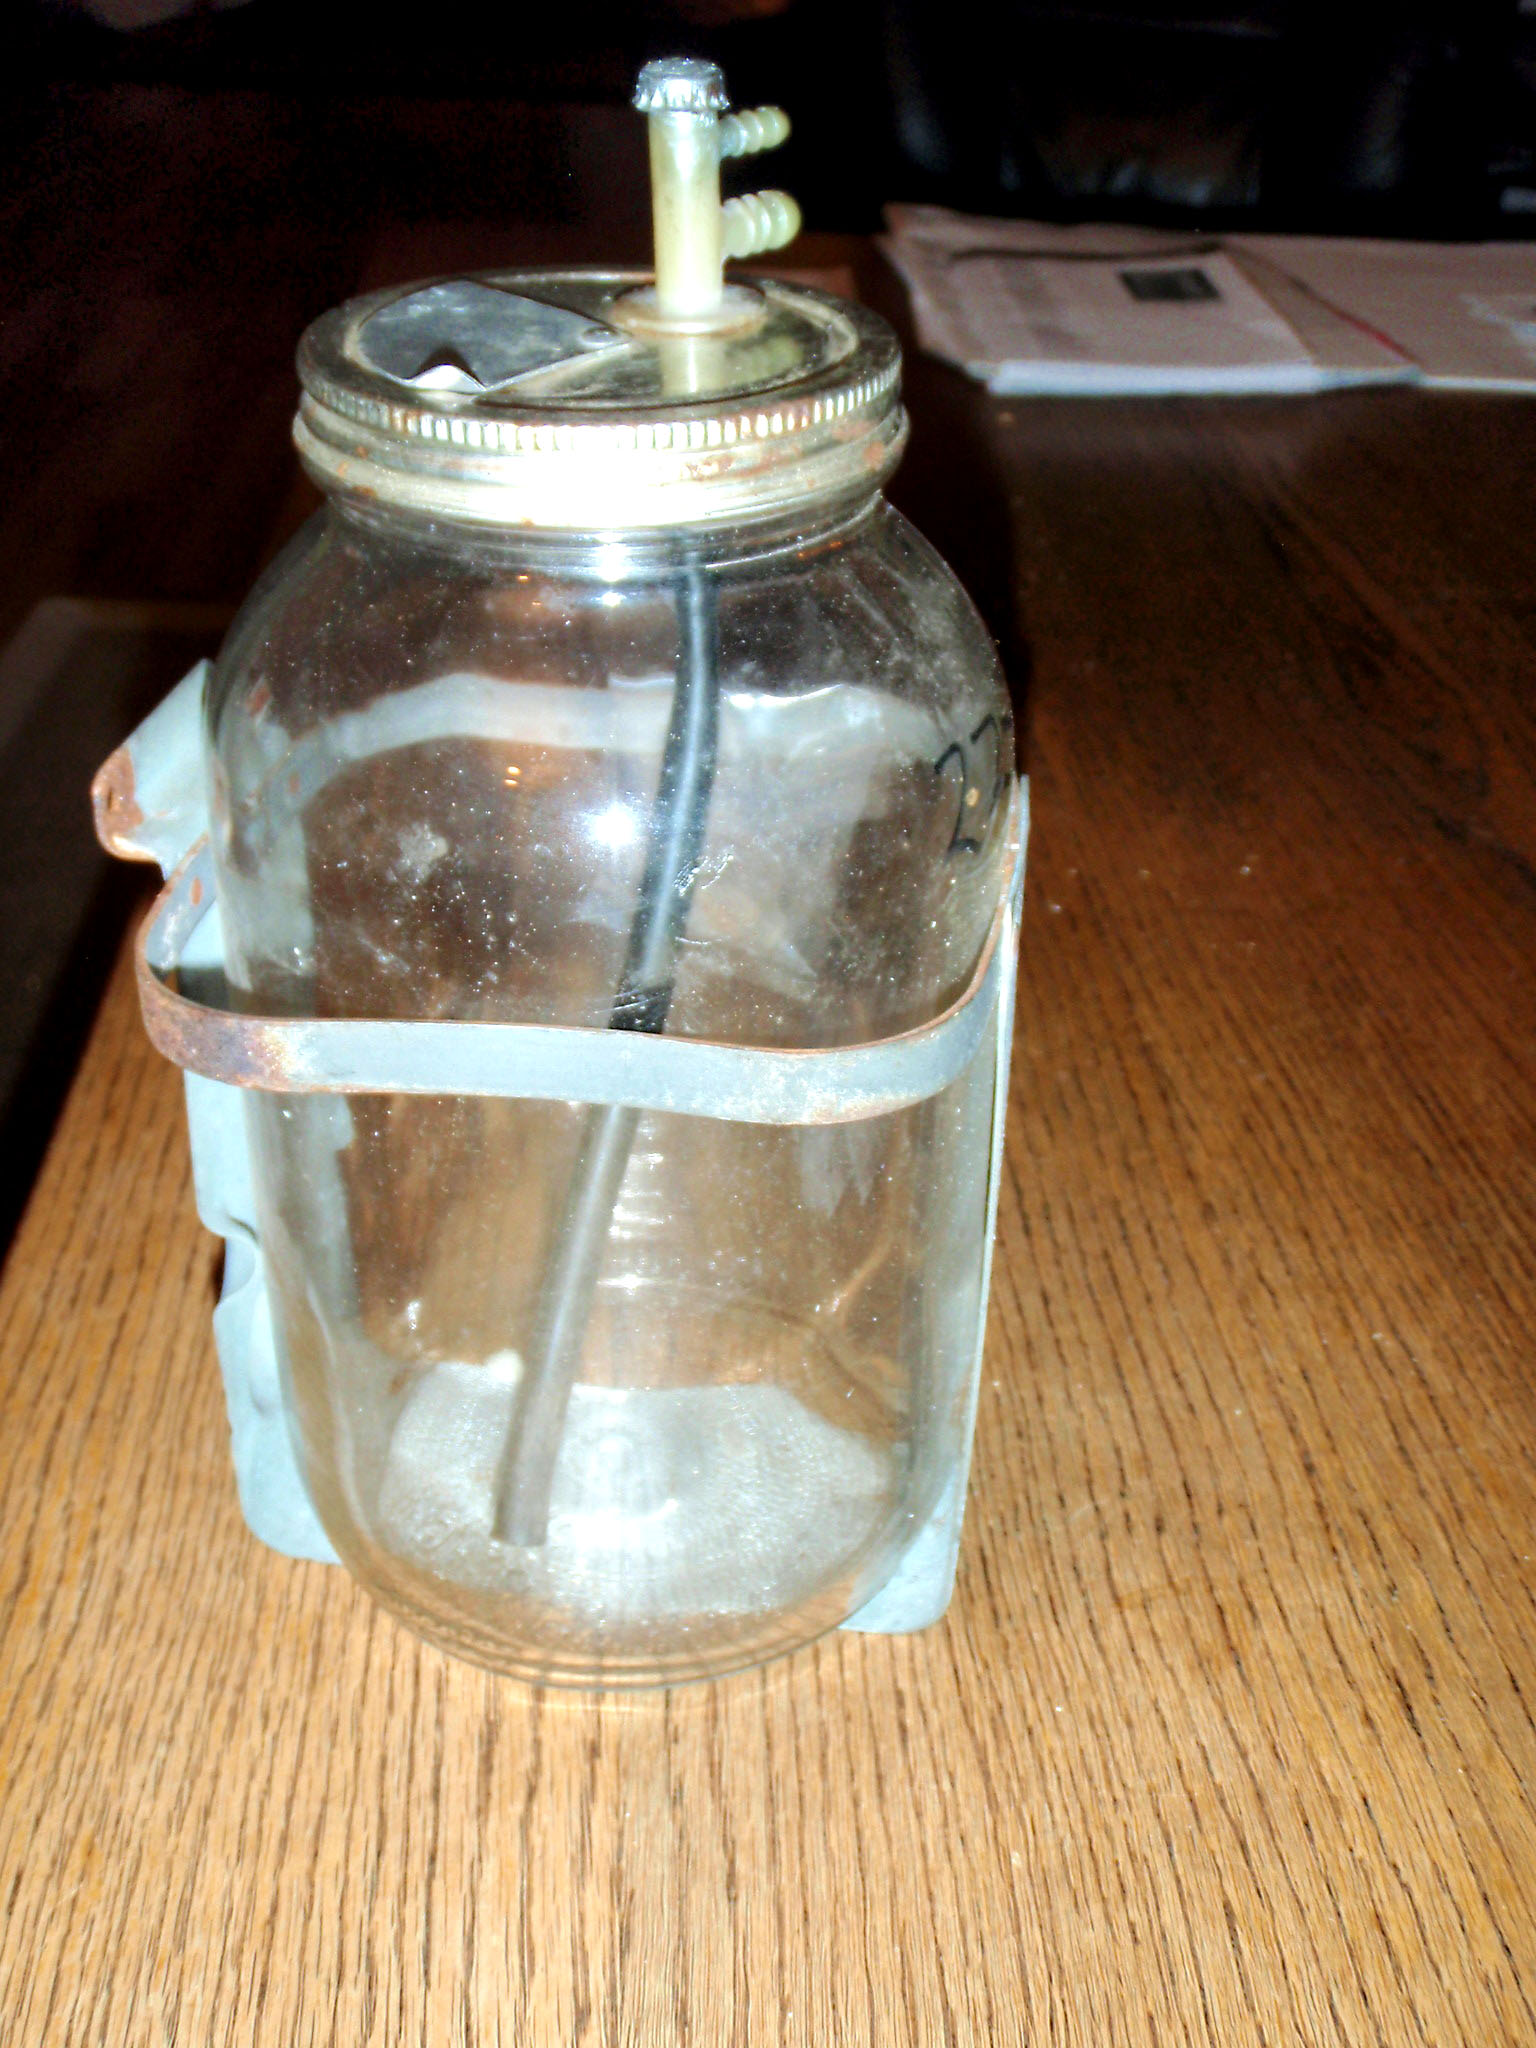
I have not done anything for several weeks, but have been thinking to start a little again. I did start looking for a washer bottle, because there was none on the car. I asked Ernie Loga in Loga Enterprises and he sent me some photos so I could see where the washer bottle was placed. It's sitting in the right-hand corner of the photo.
The next photo shows you what it looks like.
If you compare the two photos, you will see that there are differences on the lid. But I have also seen a bag, looking like a hot water bottle used in the beds of old ladies before, but I'm not sure if either is original?
Alf
Copyright 2009-2010 Alf Stalsberg – Cichlid Power |